Complete guide to tournament registration management, waitlists, player check-ins, and attendee communication. Learn automated registration systems and player database management.
The TopDeck.gg tournament software gives you powerful abilities to manage player registration exactly how you want. You'll be able to check in players, mark them as paid, change decklists, remove players, and more. In this article, we'll go over registration management and waitlists.
Registration Methods
There are three ways to register players on TopDeck.gg:
Registration by Sign-up/Event Page
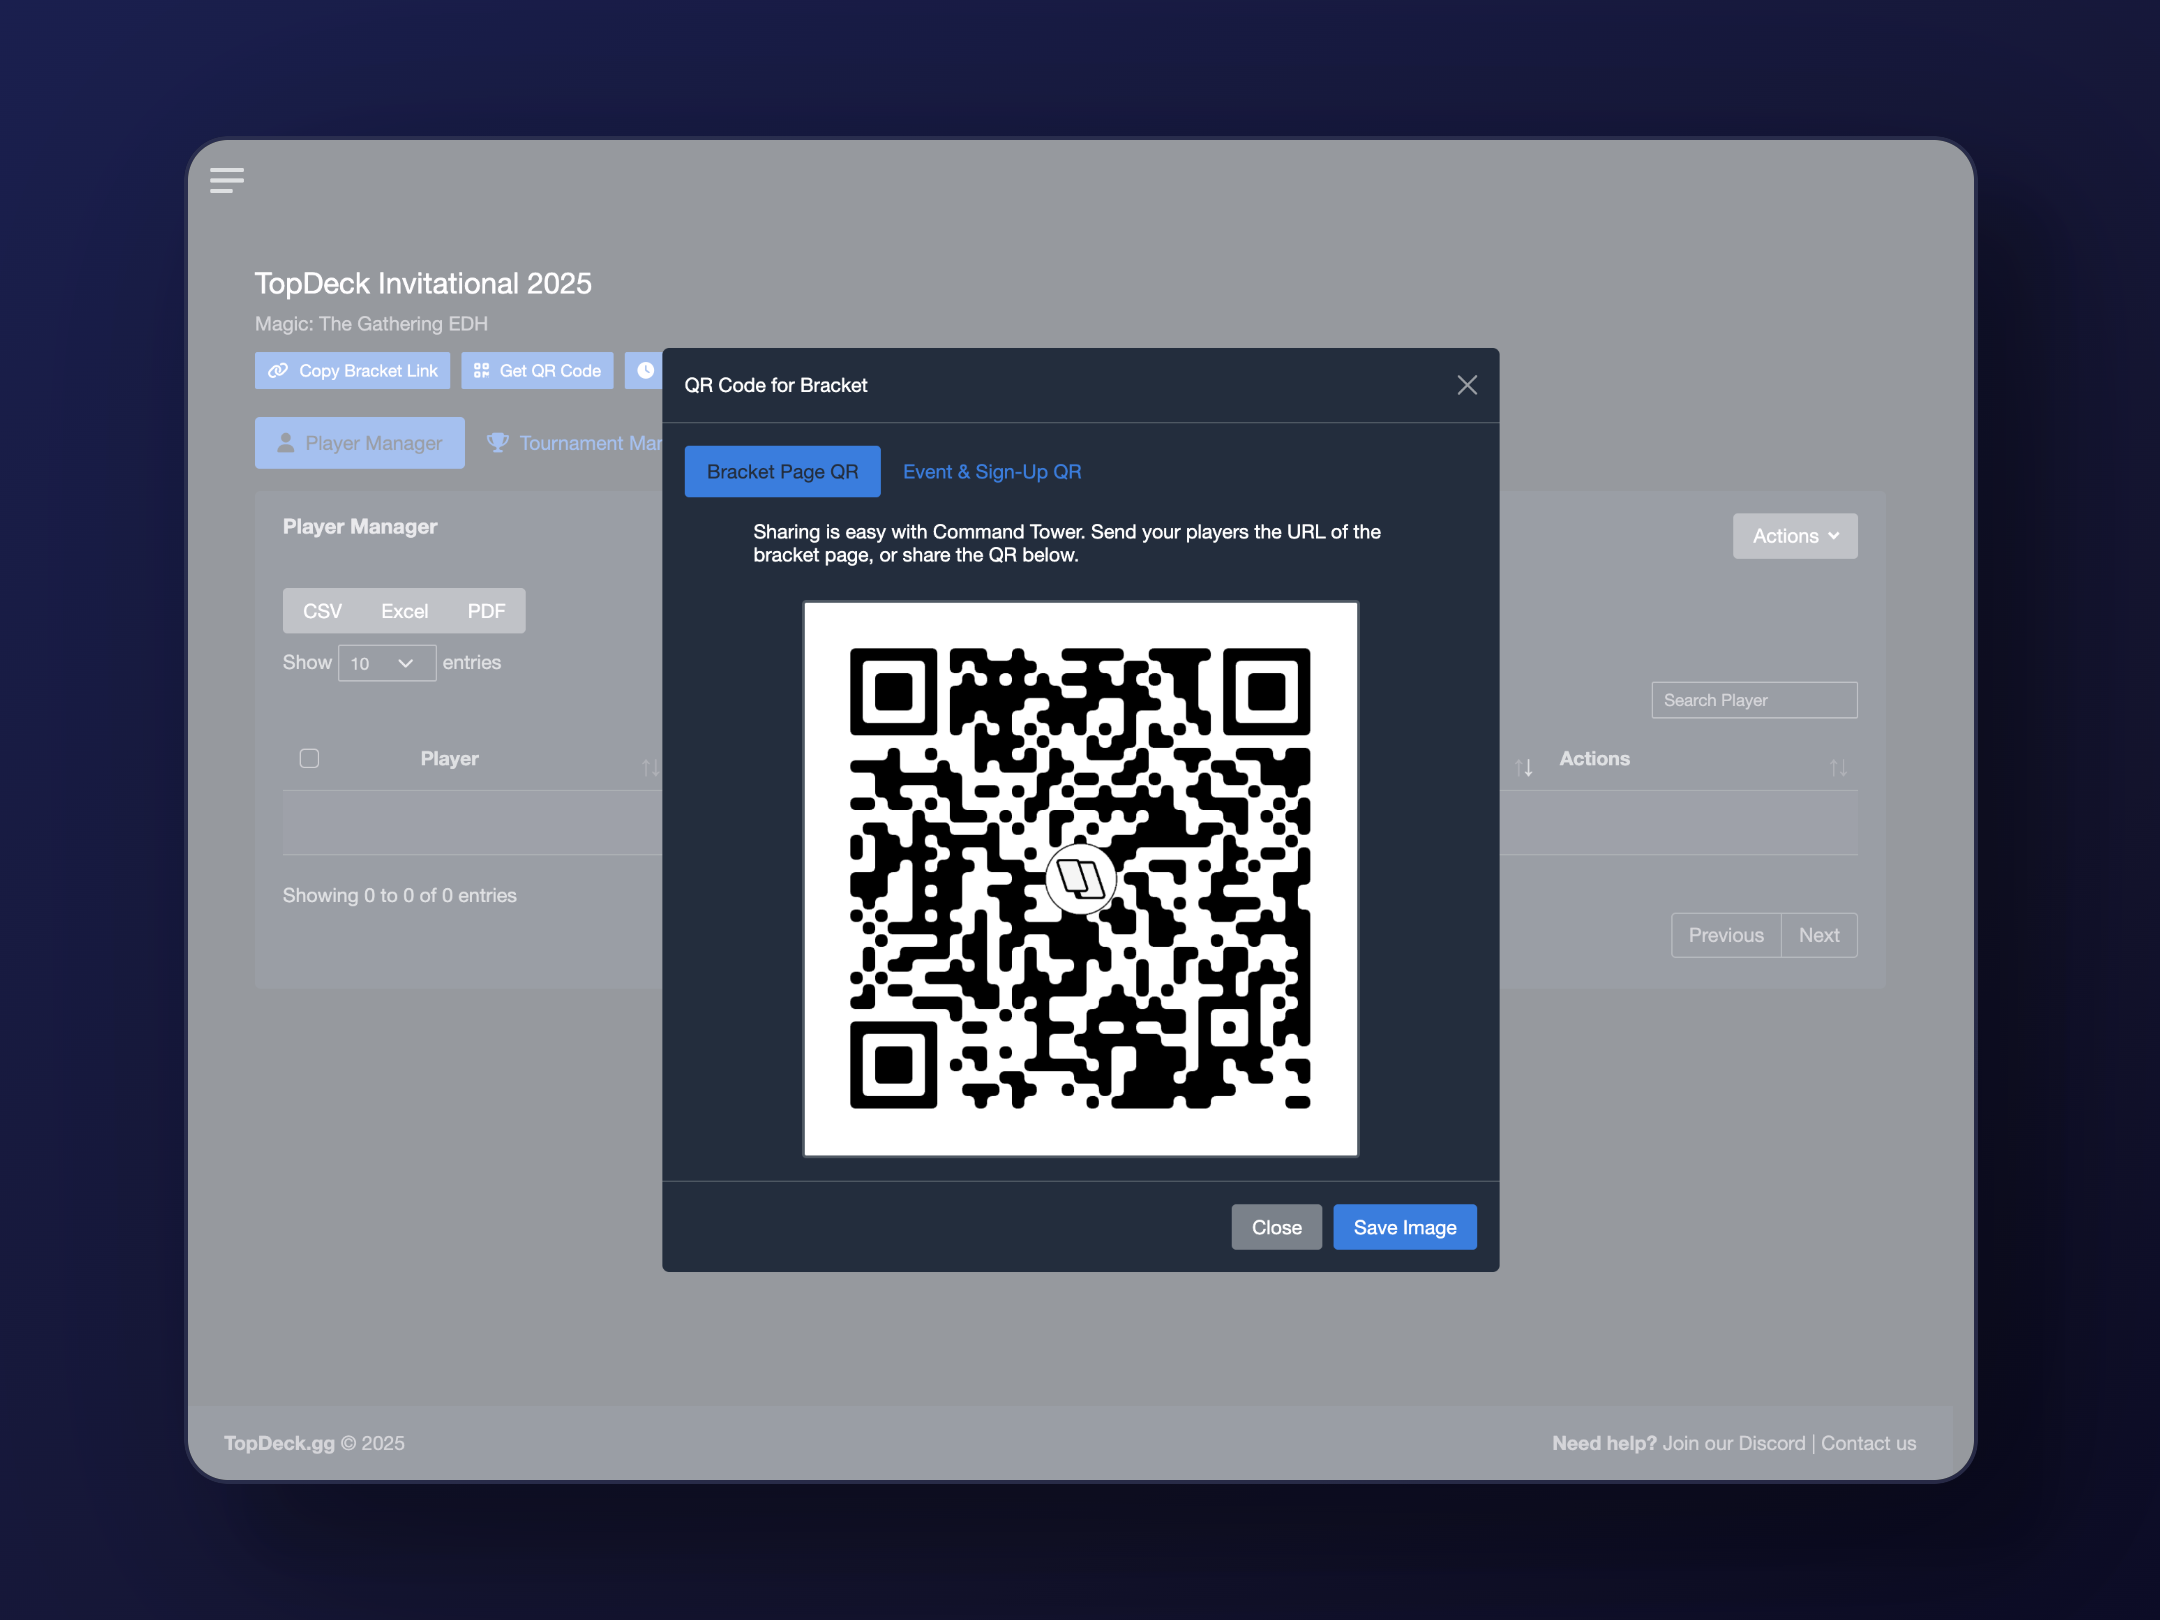
The easiest way to have players register for events is to enable either a sign-up link or create an event page. You can read more on how to do so at Creating Event Pages.
Players who sign-up via their account will be marked with a "Sign-up" tag, along with their information.
Adding Players by TopDeck.gg Account
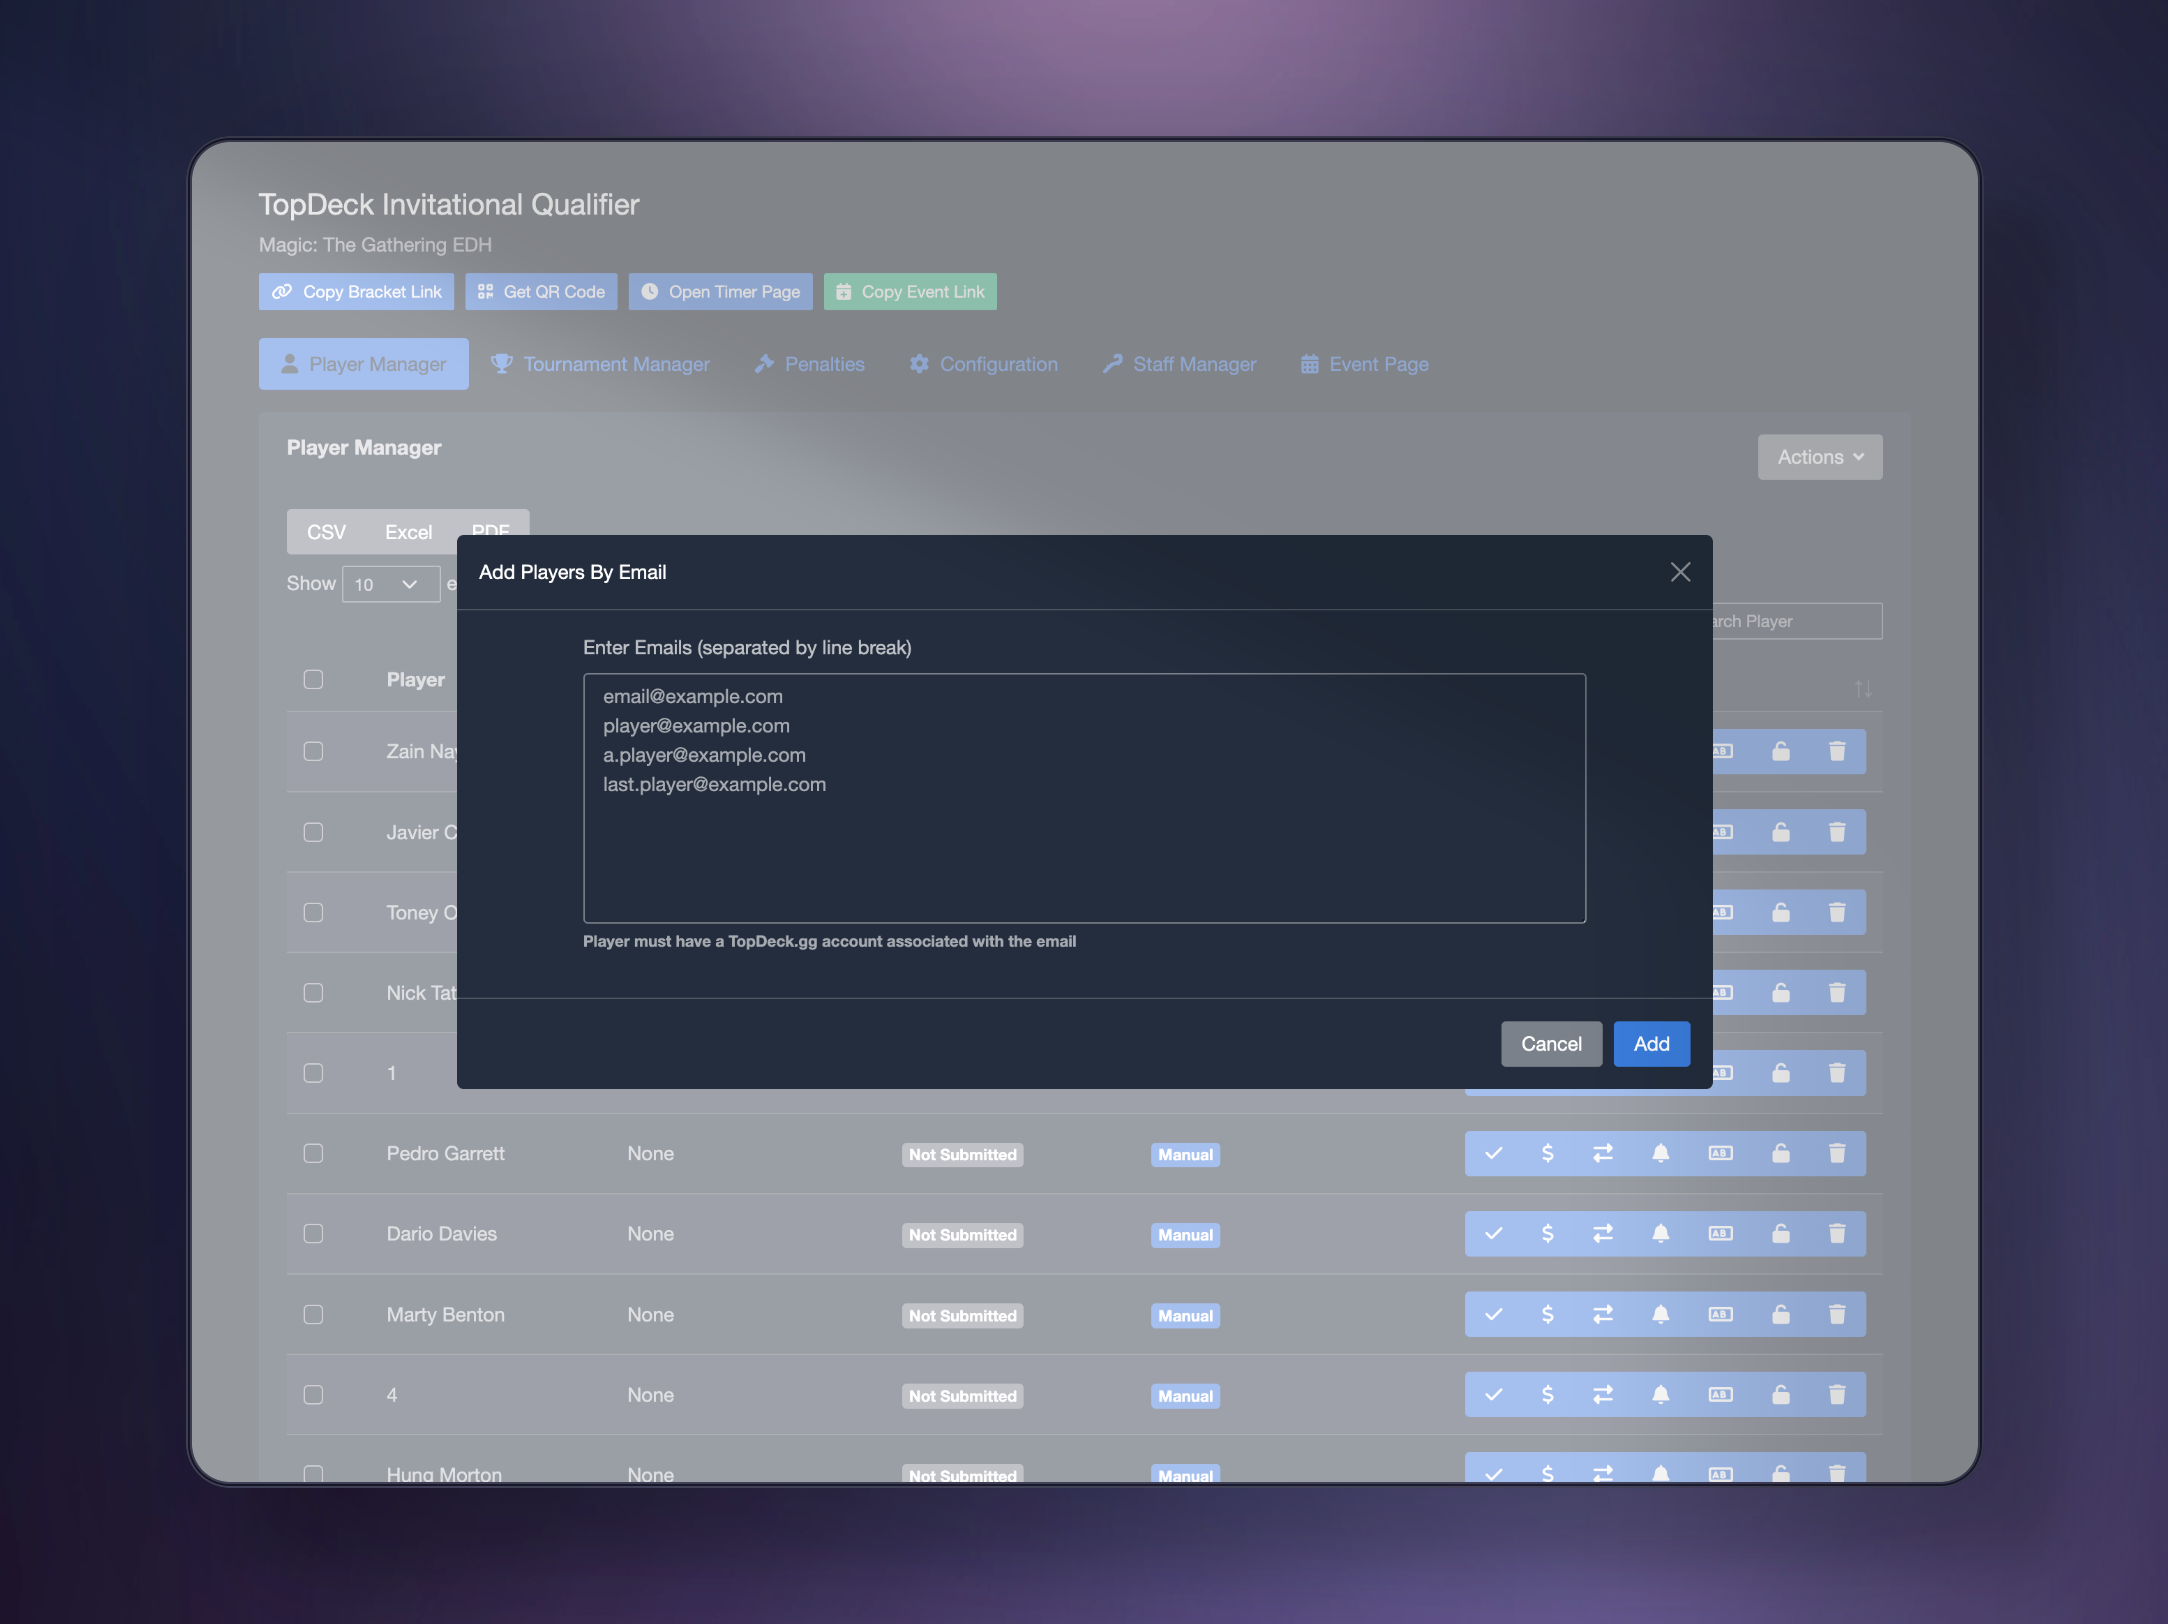
You can also add players by their TopDeck.gg account. To do so, you'll need to collect player emails that are associated with their account. You can then navigate to Add By Email under the Actions tab on the Player Manager.
Here, you'll be able to add a single, or multiple, emails, each separated by a line break.
The system will skip anyone who doesn't have an account associated with TopDeck.gg.
Adding Players Manually
Lastly, you can add players without an account manually. Under the Actions tab on the Player Manager, click Add Players Manually.
In the popup, you'll be able to add each player by name, separated by a line break. Players added this way do not have accounts associated with them and will be tagged as "Manual". Additionally, they will have no email associated.
Note that manually added players have very limited ways to interact with TopDeck.gg. They will be unable to check in, submit decks, see the bracket from the mobile app, and you won't be able to do things like message them. We highly recommend that players have TopDeck.gg accounts and register for events with those accounts.
Player Information
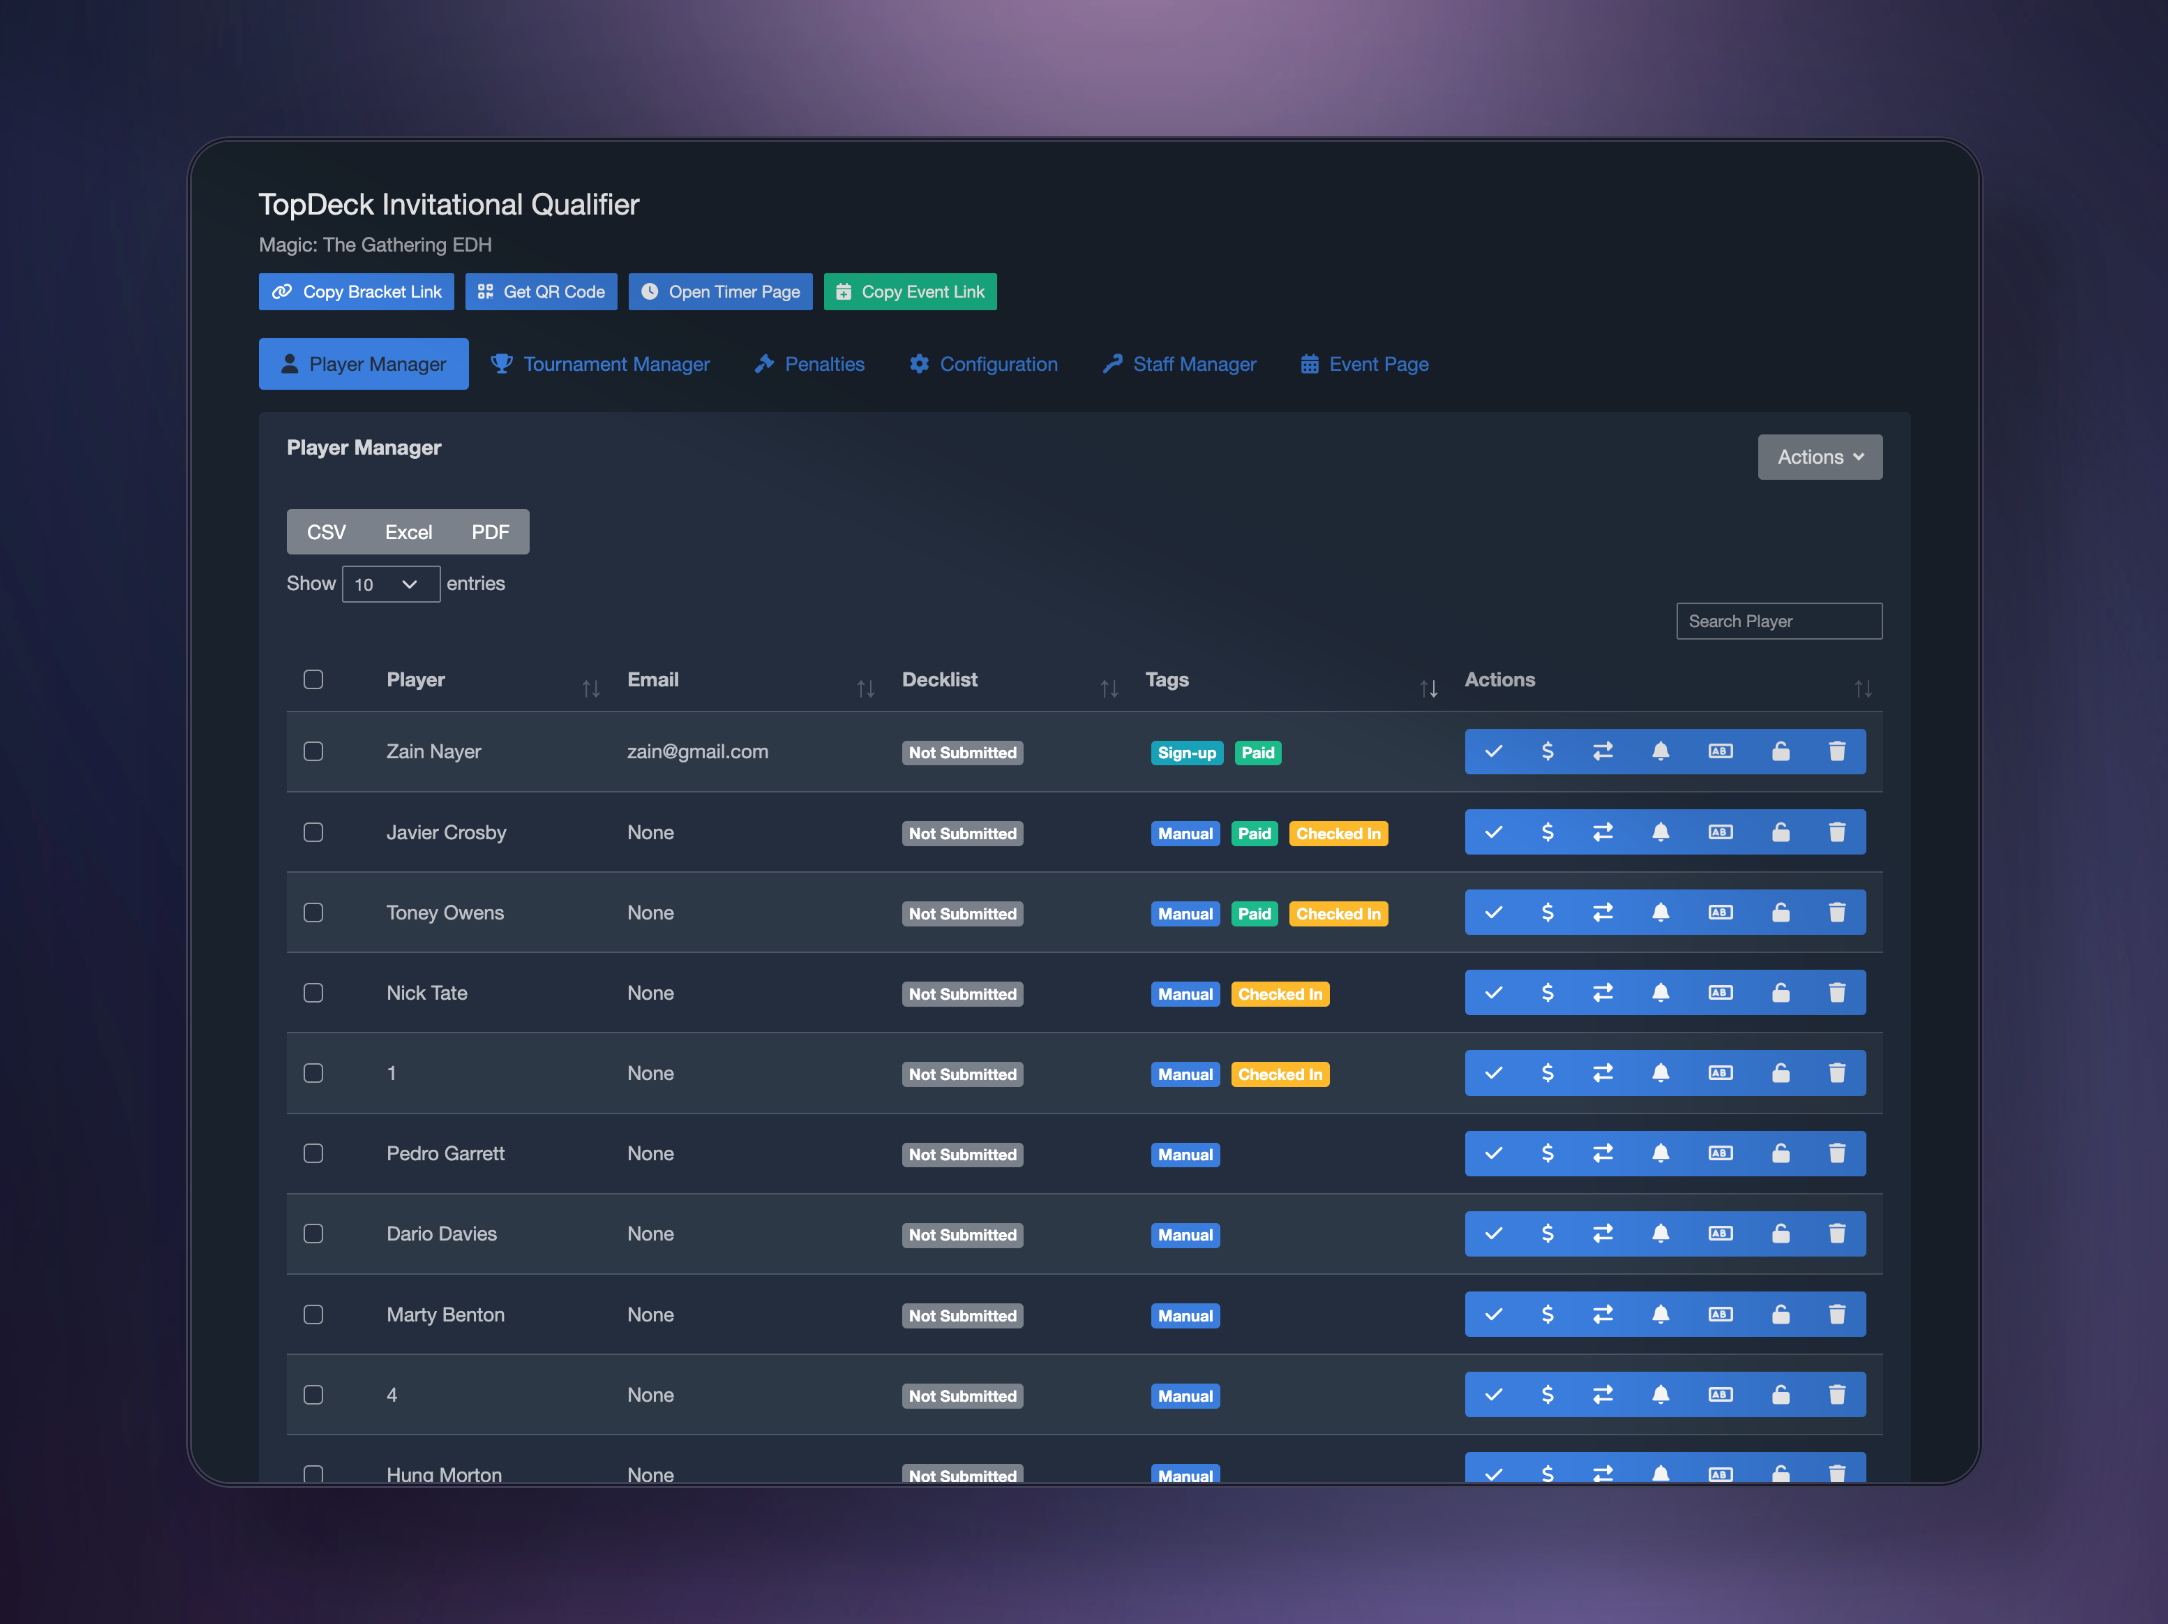
Once players have begun registering, you'll be able to see everyone who has registered for the event on the Player Manager tab.
This tab automatically refreshes every time someone new joins.
In this table, you'll be able to see player names, emails, decklist submissions, and any tags associated with each player.
Players who have paid via TopDeck will have a "Paid" tag automatically assigned to them.
Clicking a decklist that's been submitted will open up the list, making it easy to see what has been submitted, and access for deck checks. You can set things like decklist submission deadlines by creating an event page.
Finally, you can export the table as a CSV, Excel file, or PDF by clicking one of the export options in the top left.
Managing Players
There are several options available to you to manage players. You'll find all options under the Actions column:
Toggle Check-in
Toggle the "checked-in" status of a player. Useful when running check-ins day of at an event. Note that the check-in badge also appears for players when using the self-check-in round.
Toggle Paid Status
Toggles the paid status of a user. You can use this to mark players who have paid on-site and more. Players who have paid via TopDeck payment processing will automatically have the Paid tag.
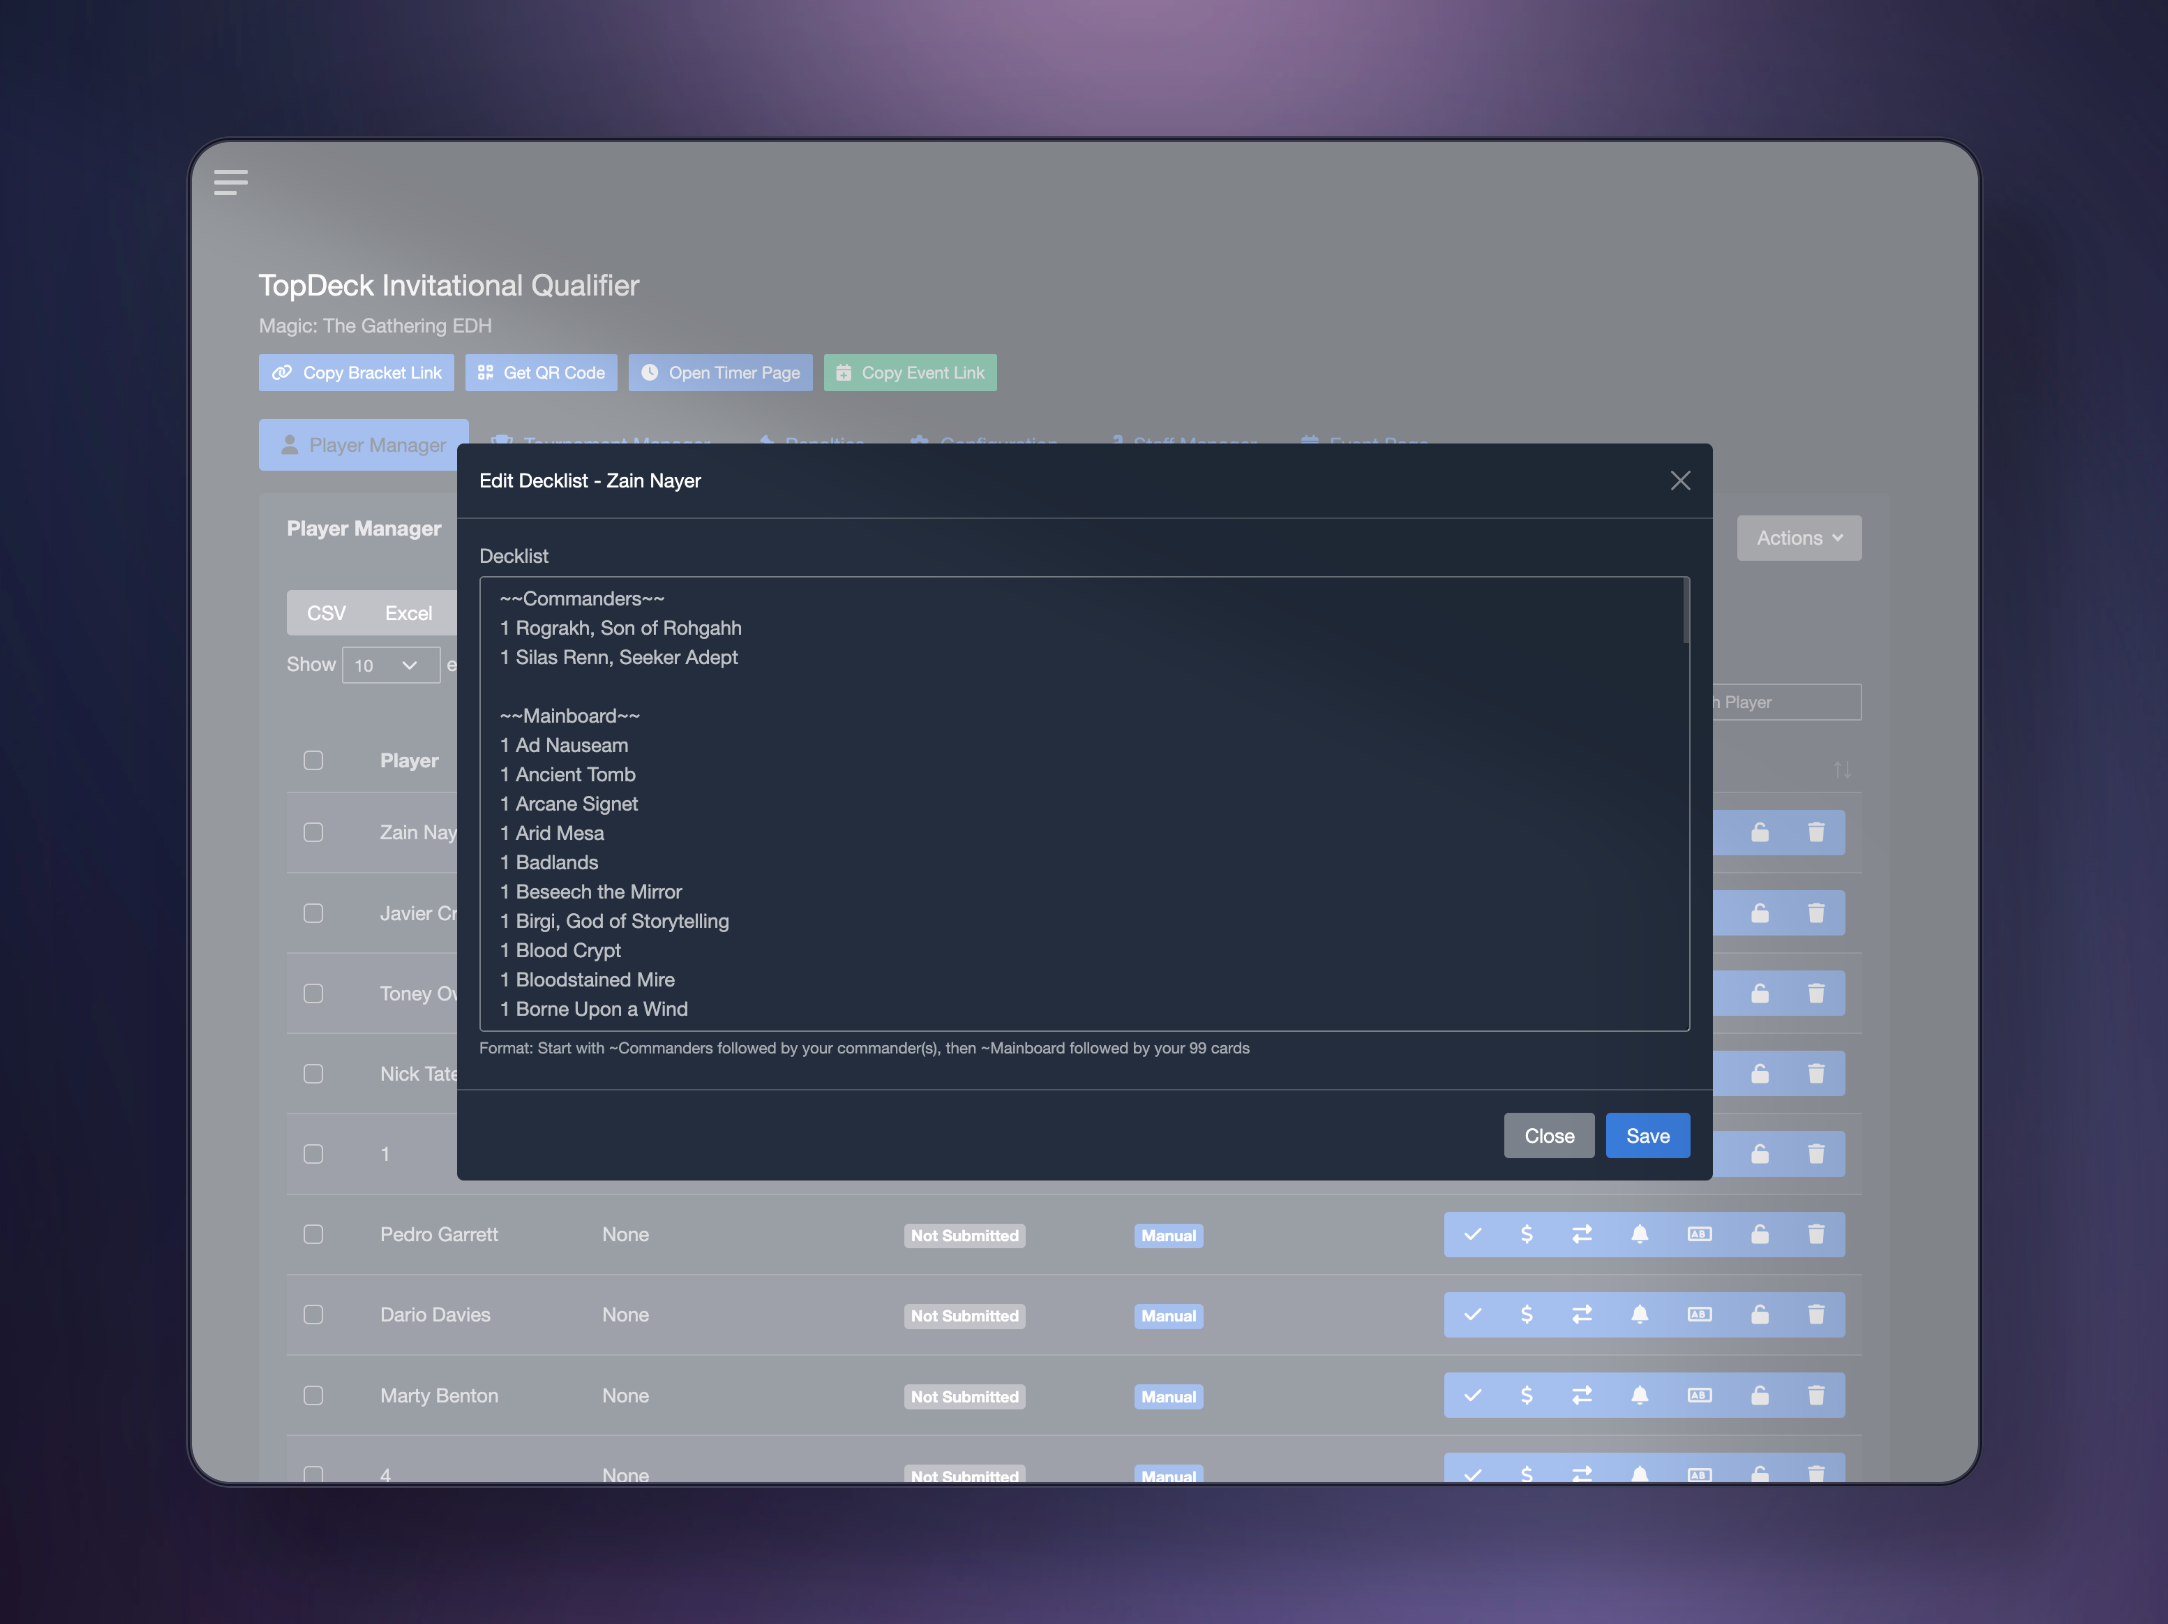
Modify Decklist
Allows you to add or modify a decklist. If a user has a decklist submitted, the textbox will be pre-populated with their current list. You can make any card modifications here.
If a user has no decklist, you'll be able to submit one for them from this screen. This textbox accepts Moxfield links for MTG tournaments as well, and will extract the deck data from the link for you.
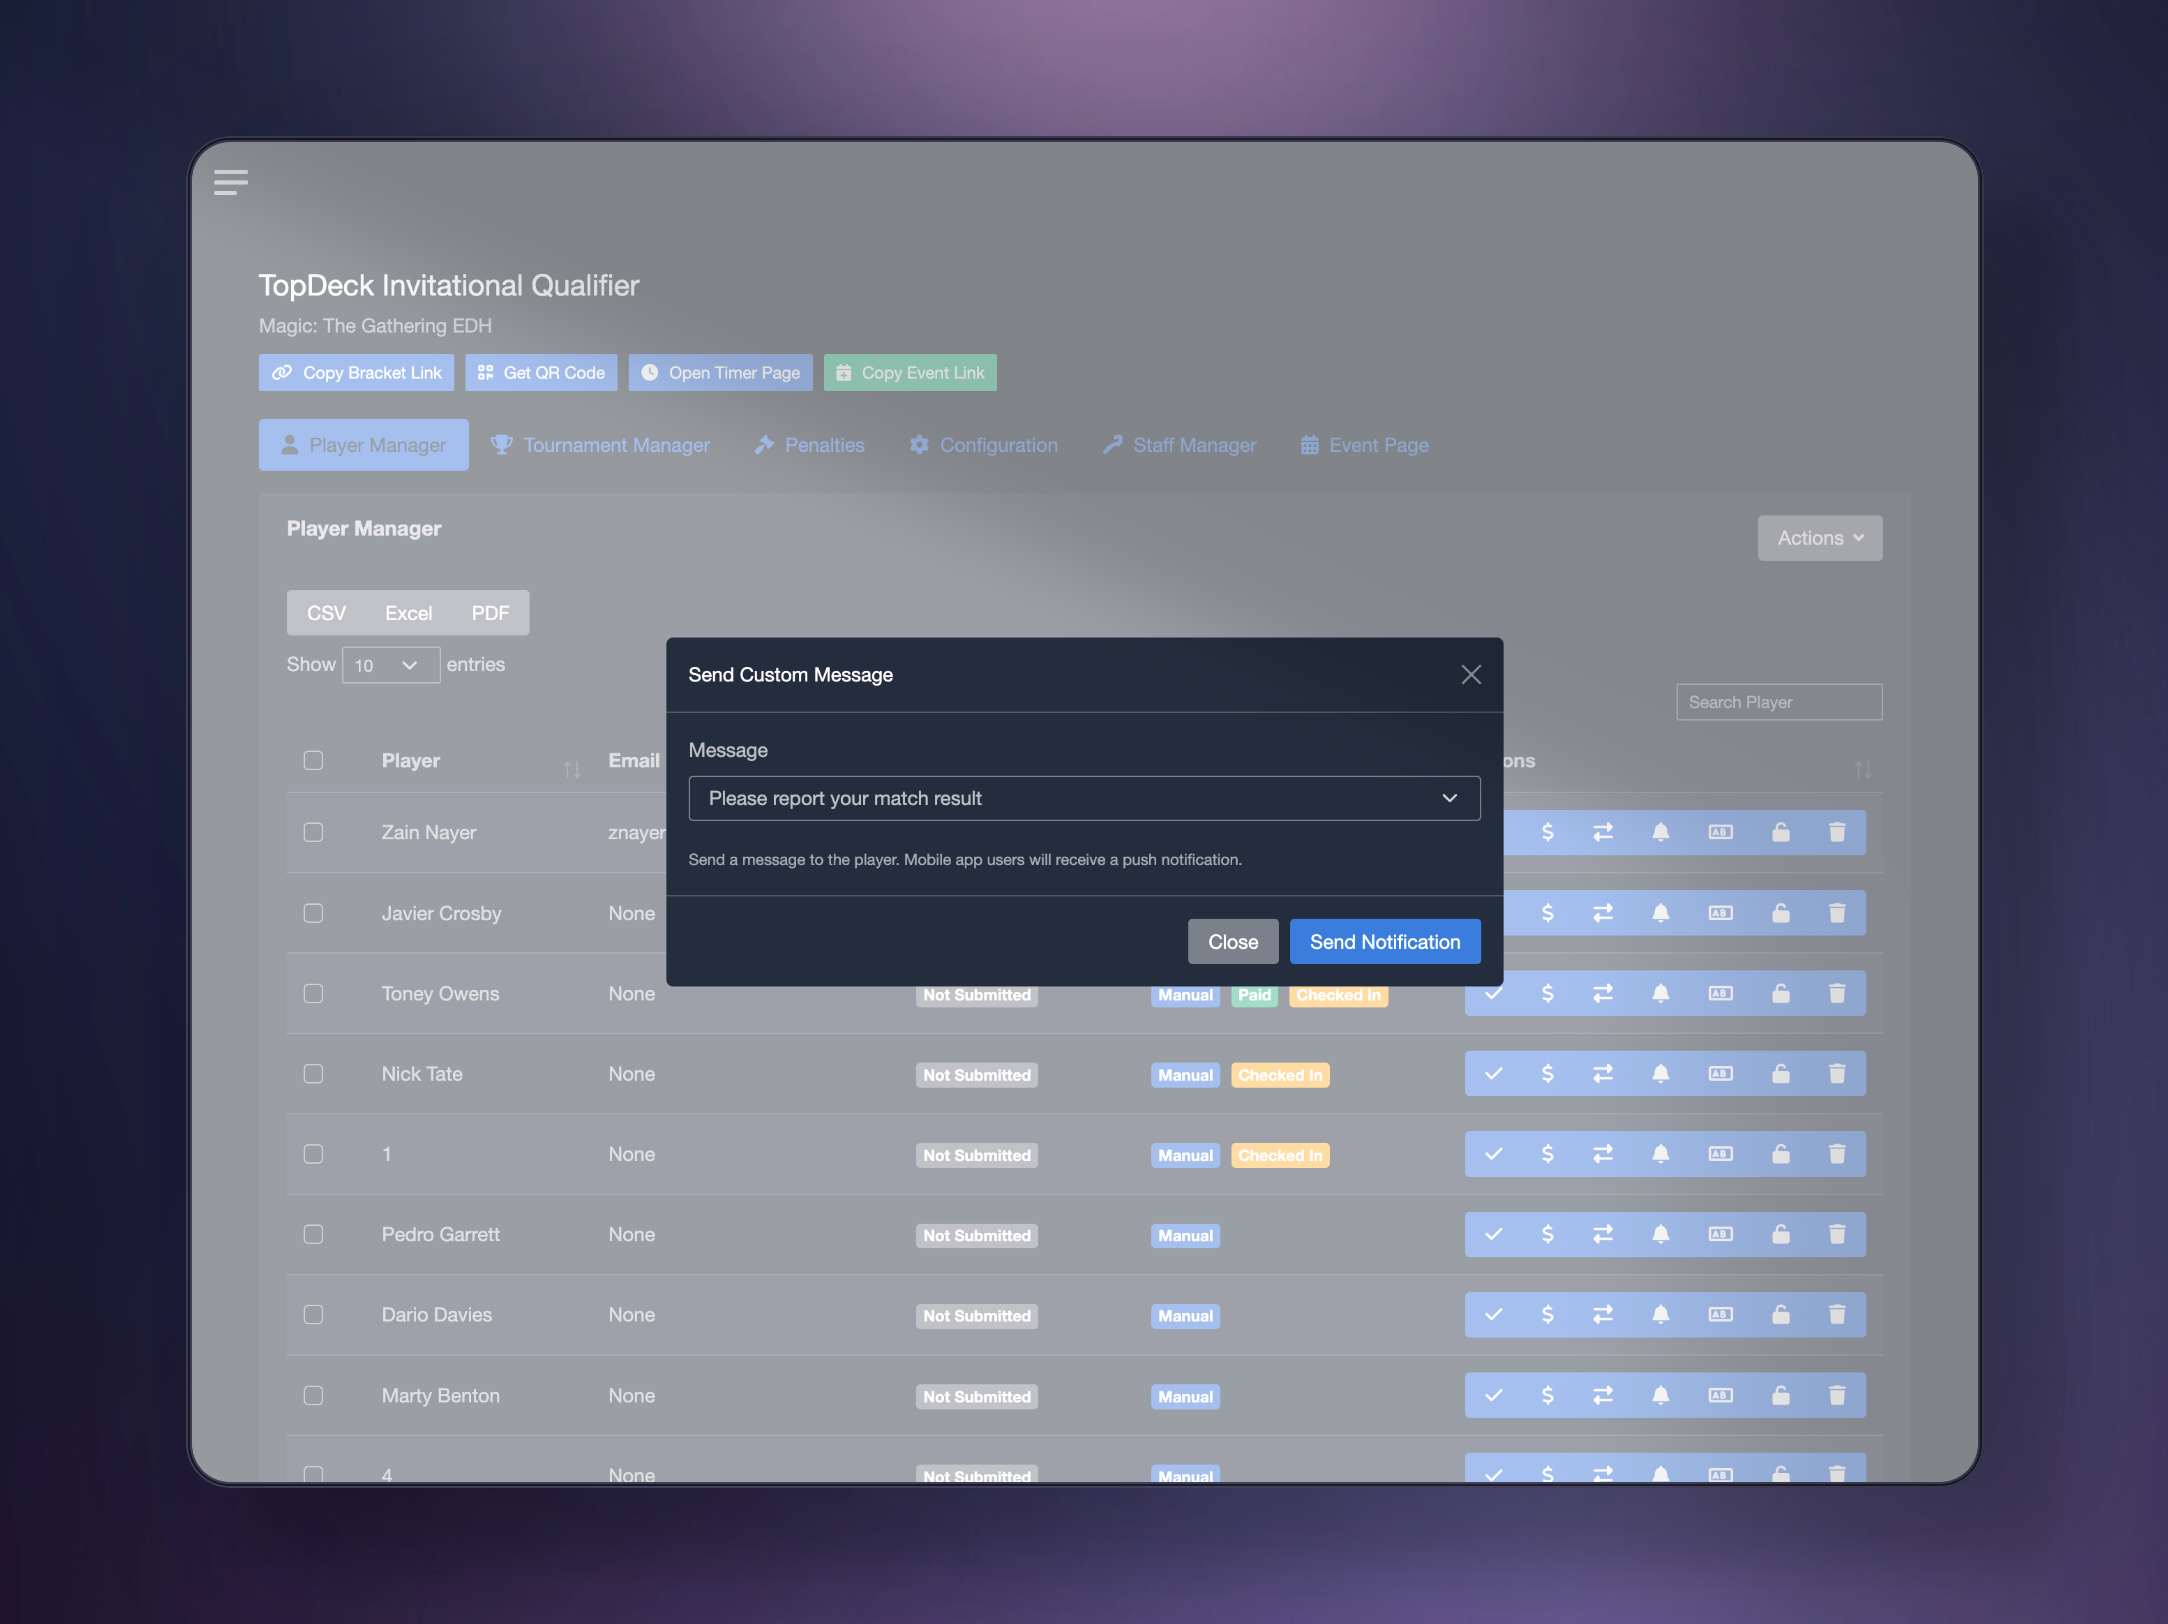
Send Message
Allows you to send a push notification to a player via the app. The player will receive a notification on the mobile app, as well as their inbox on the TopDeck.gg website.
The form comes with some default options, or you can write your own custom message.
This is useful for reminding a player to submit a decklist, join the feature match, and more.
Change Name
Allows you to change the name of a player for this tournament only. Useful to remove inappropriate names, or duplicate names (for example, two John Smiths).
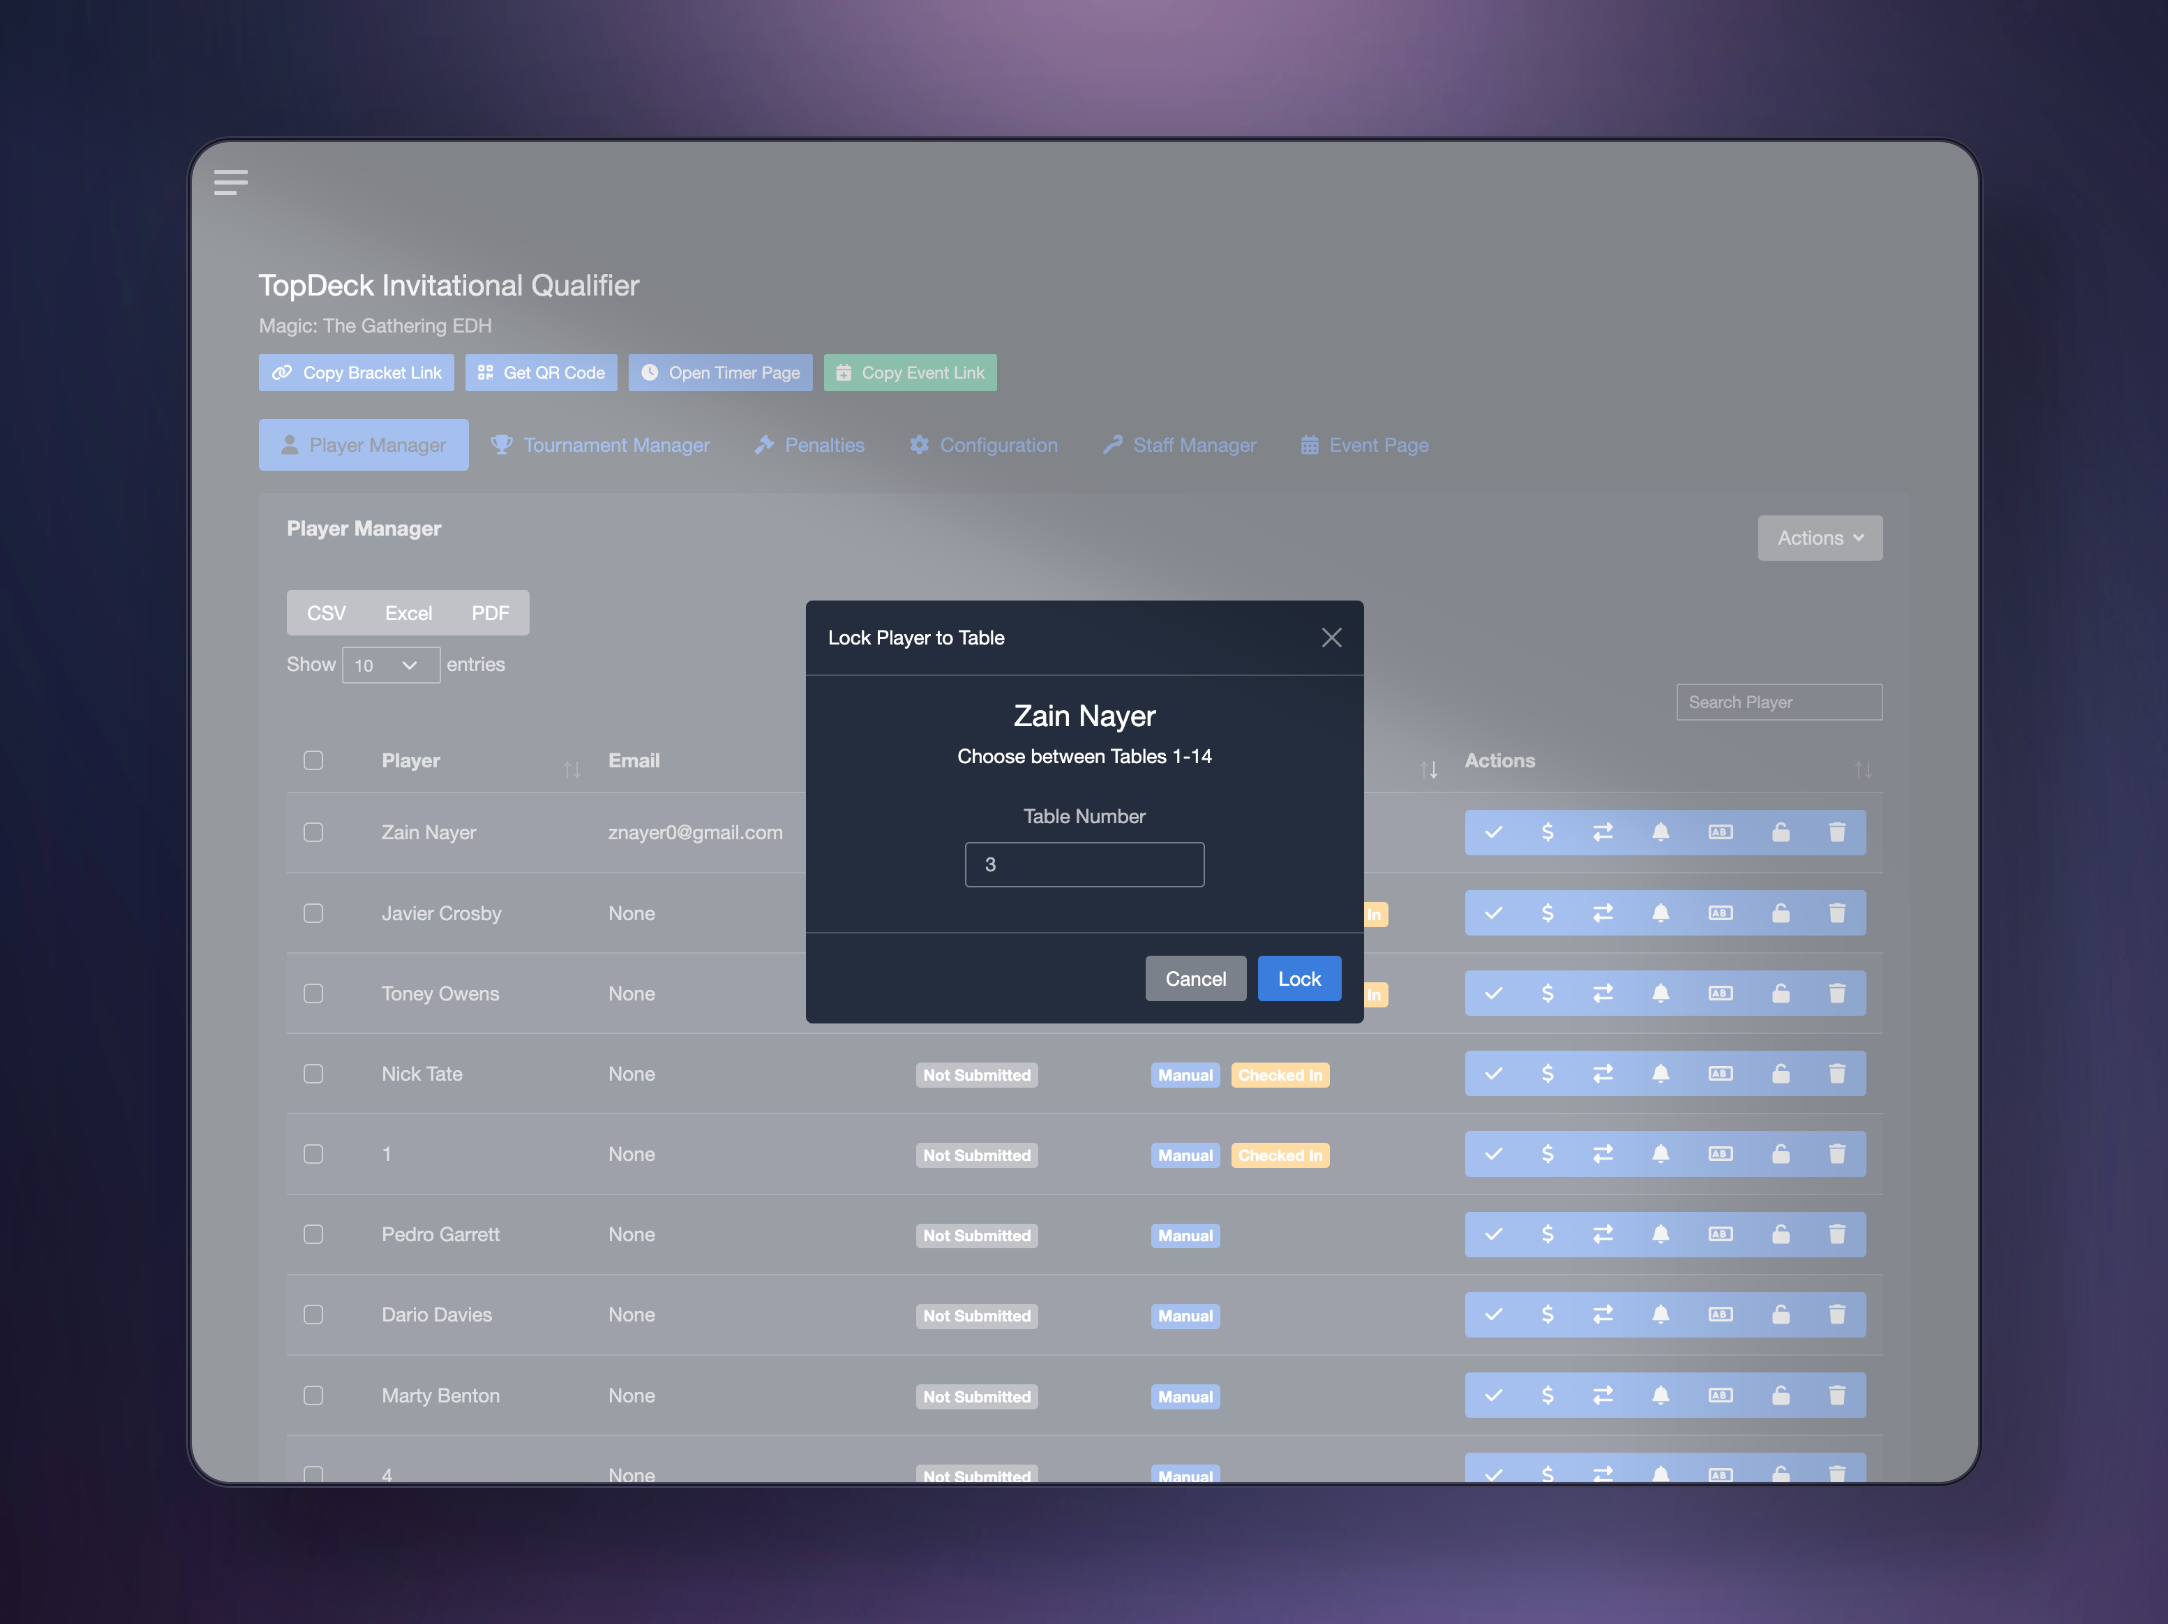
Lock Player to Table
You can lock a player to any valid table at your event.
This is particularly useful for players with accessibility needs: you can lock them to table 2 so they don't have to move around the room for each match.
Locking a player to a table does not affect matchmaking. The players who would be paired against the locked player are simply moved to that table.
Delete Player
Lastly, you can delete a player from the event. This completely removes them from the event, and is different from dropping.
Deleting a player also opens up the player cap, so if an event was capped at 64 players and 64 players were registered, deleting someone would reduce the count to 63 players and open up a spot.
Please note, you cannot delete players after starting the tournament. You will need to drop them instead.
Waitlist Management
TopDeck.gg comes equipped with an automated waitlist system so you can spend less time managing registrations.
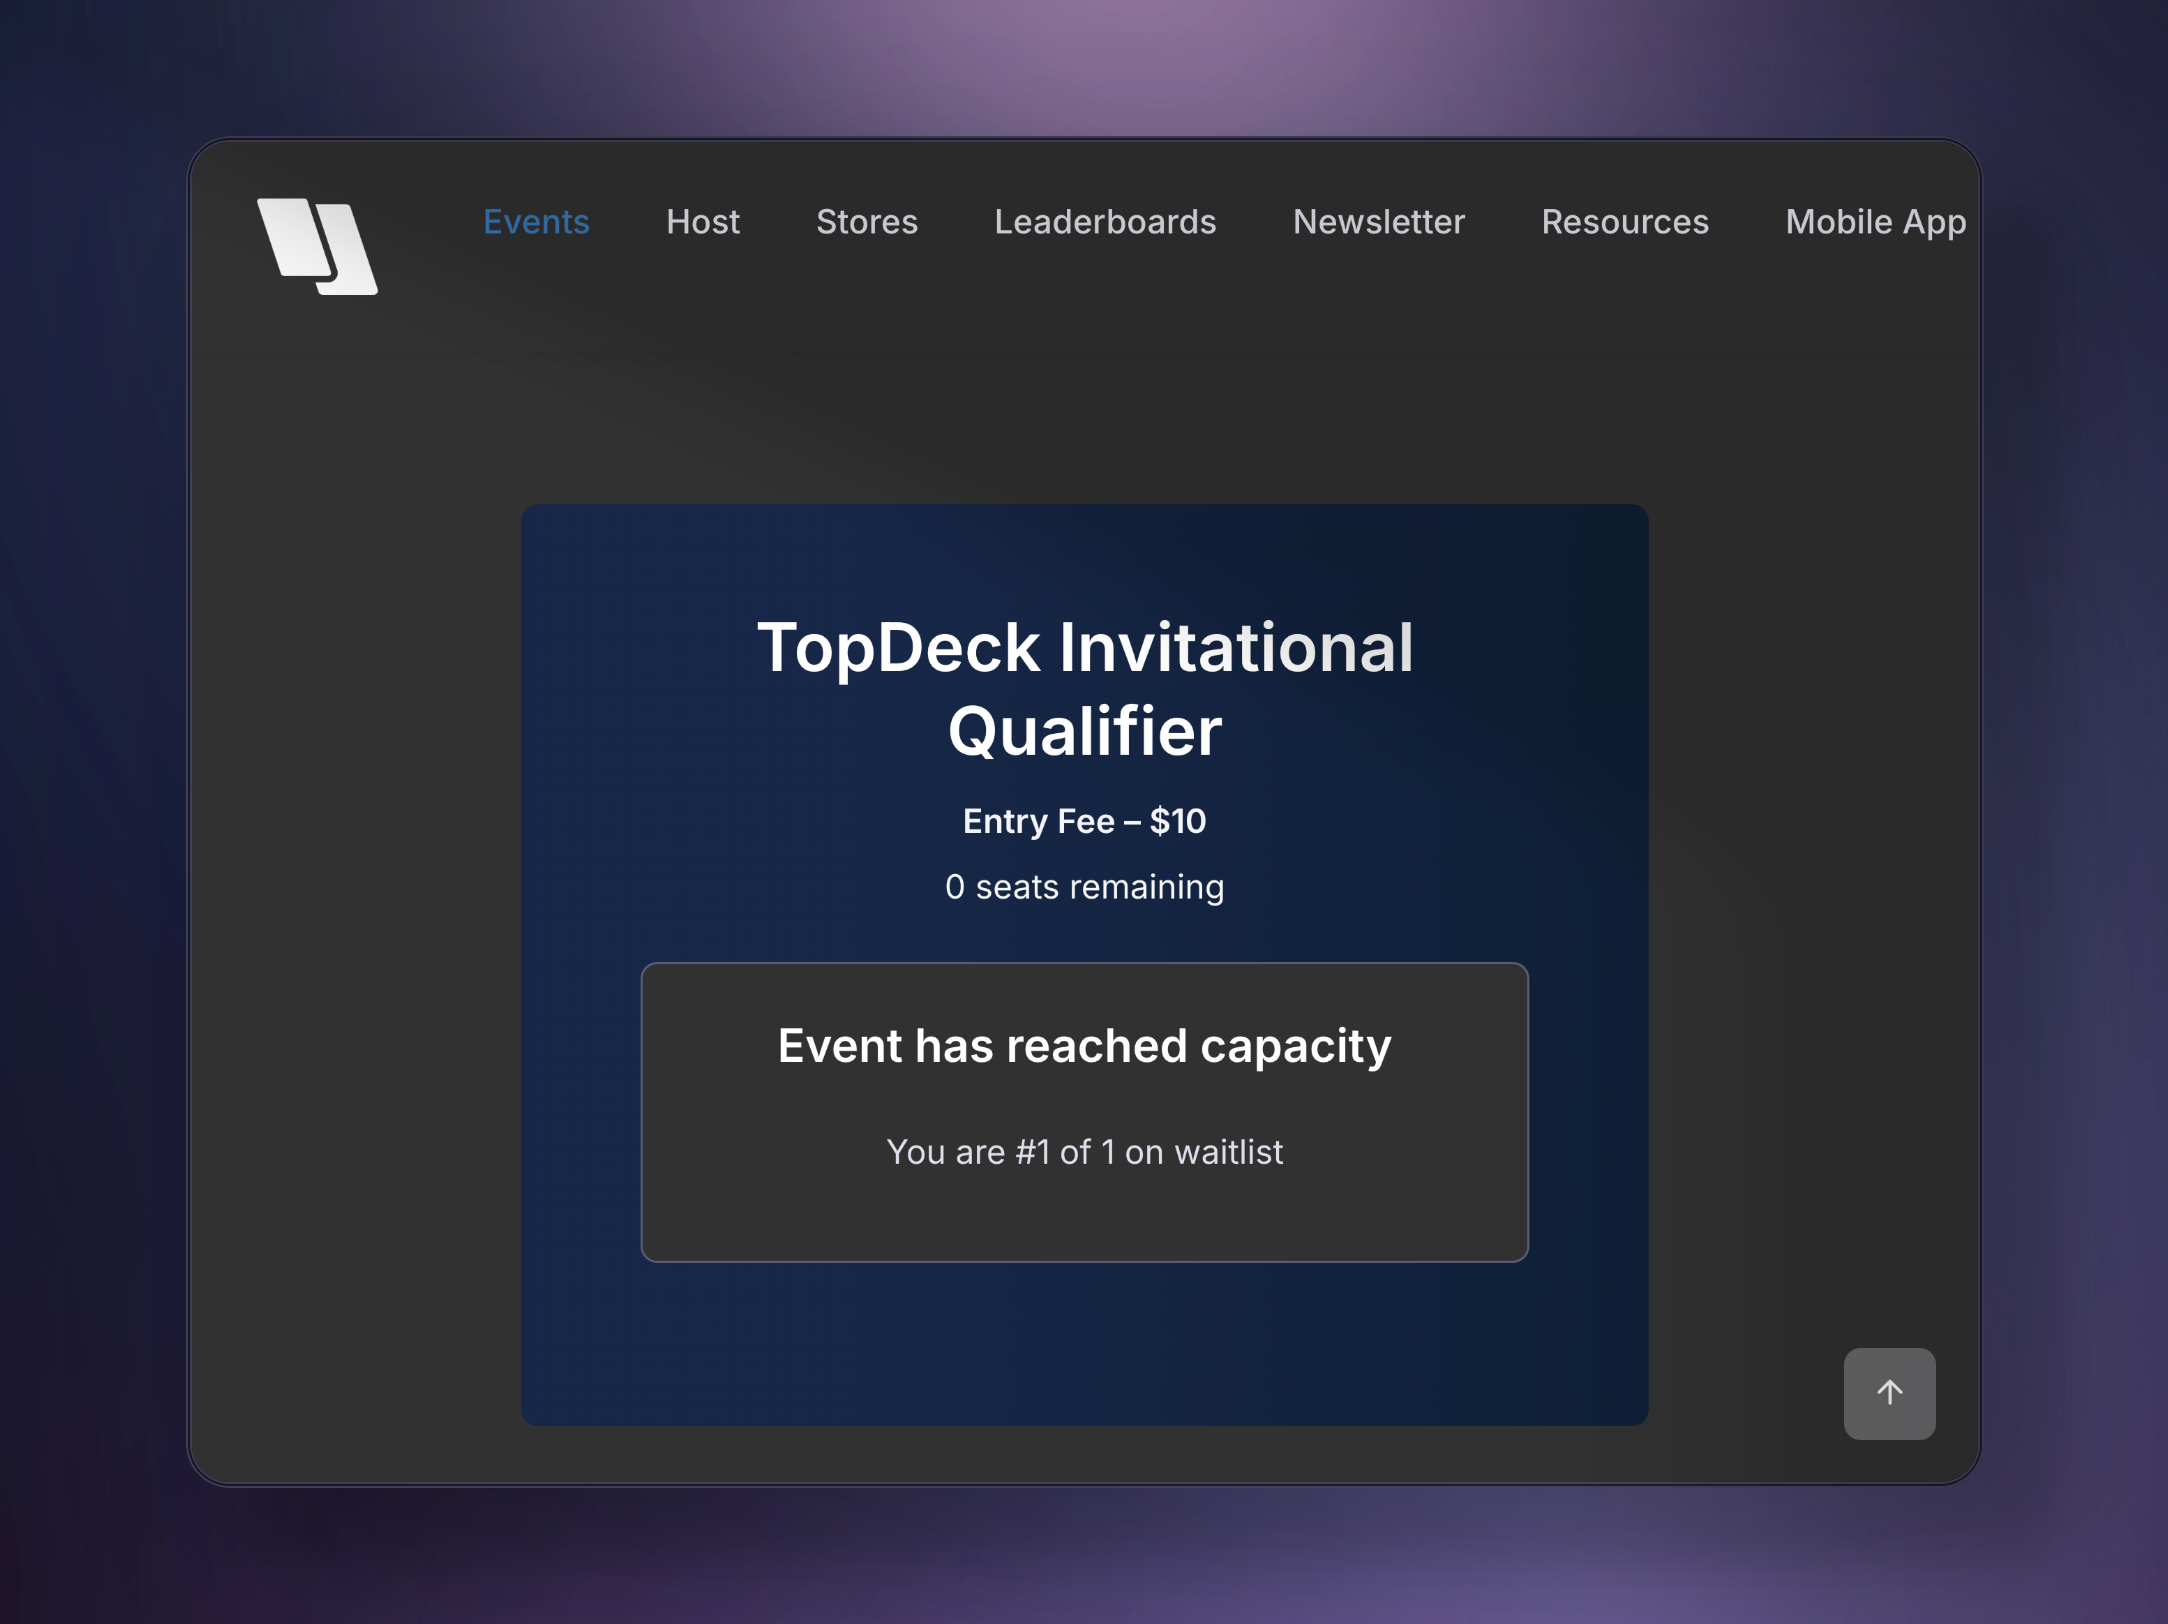
To use the system, you will need to have created an event page, as players will be able to join the waitlist from there once your event hits its player cap.
Waitlists are automatically managed for you in queue order (those who joined first get off the waitlist first).
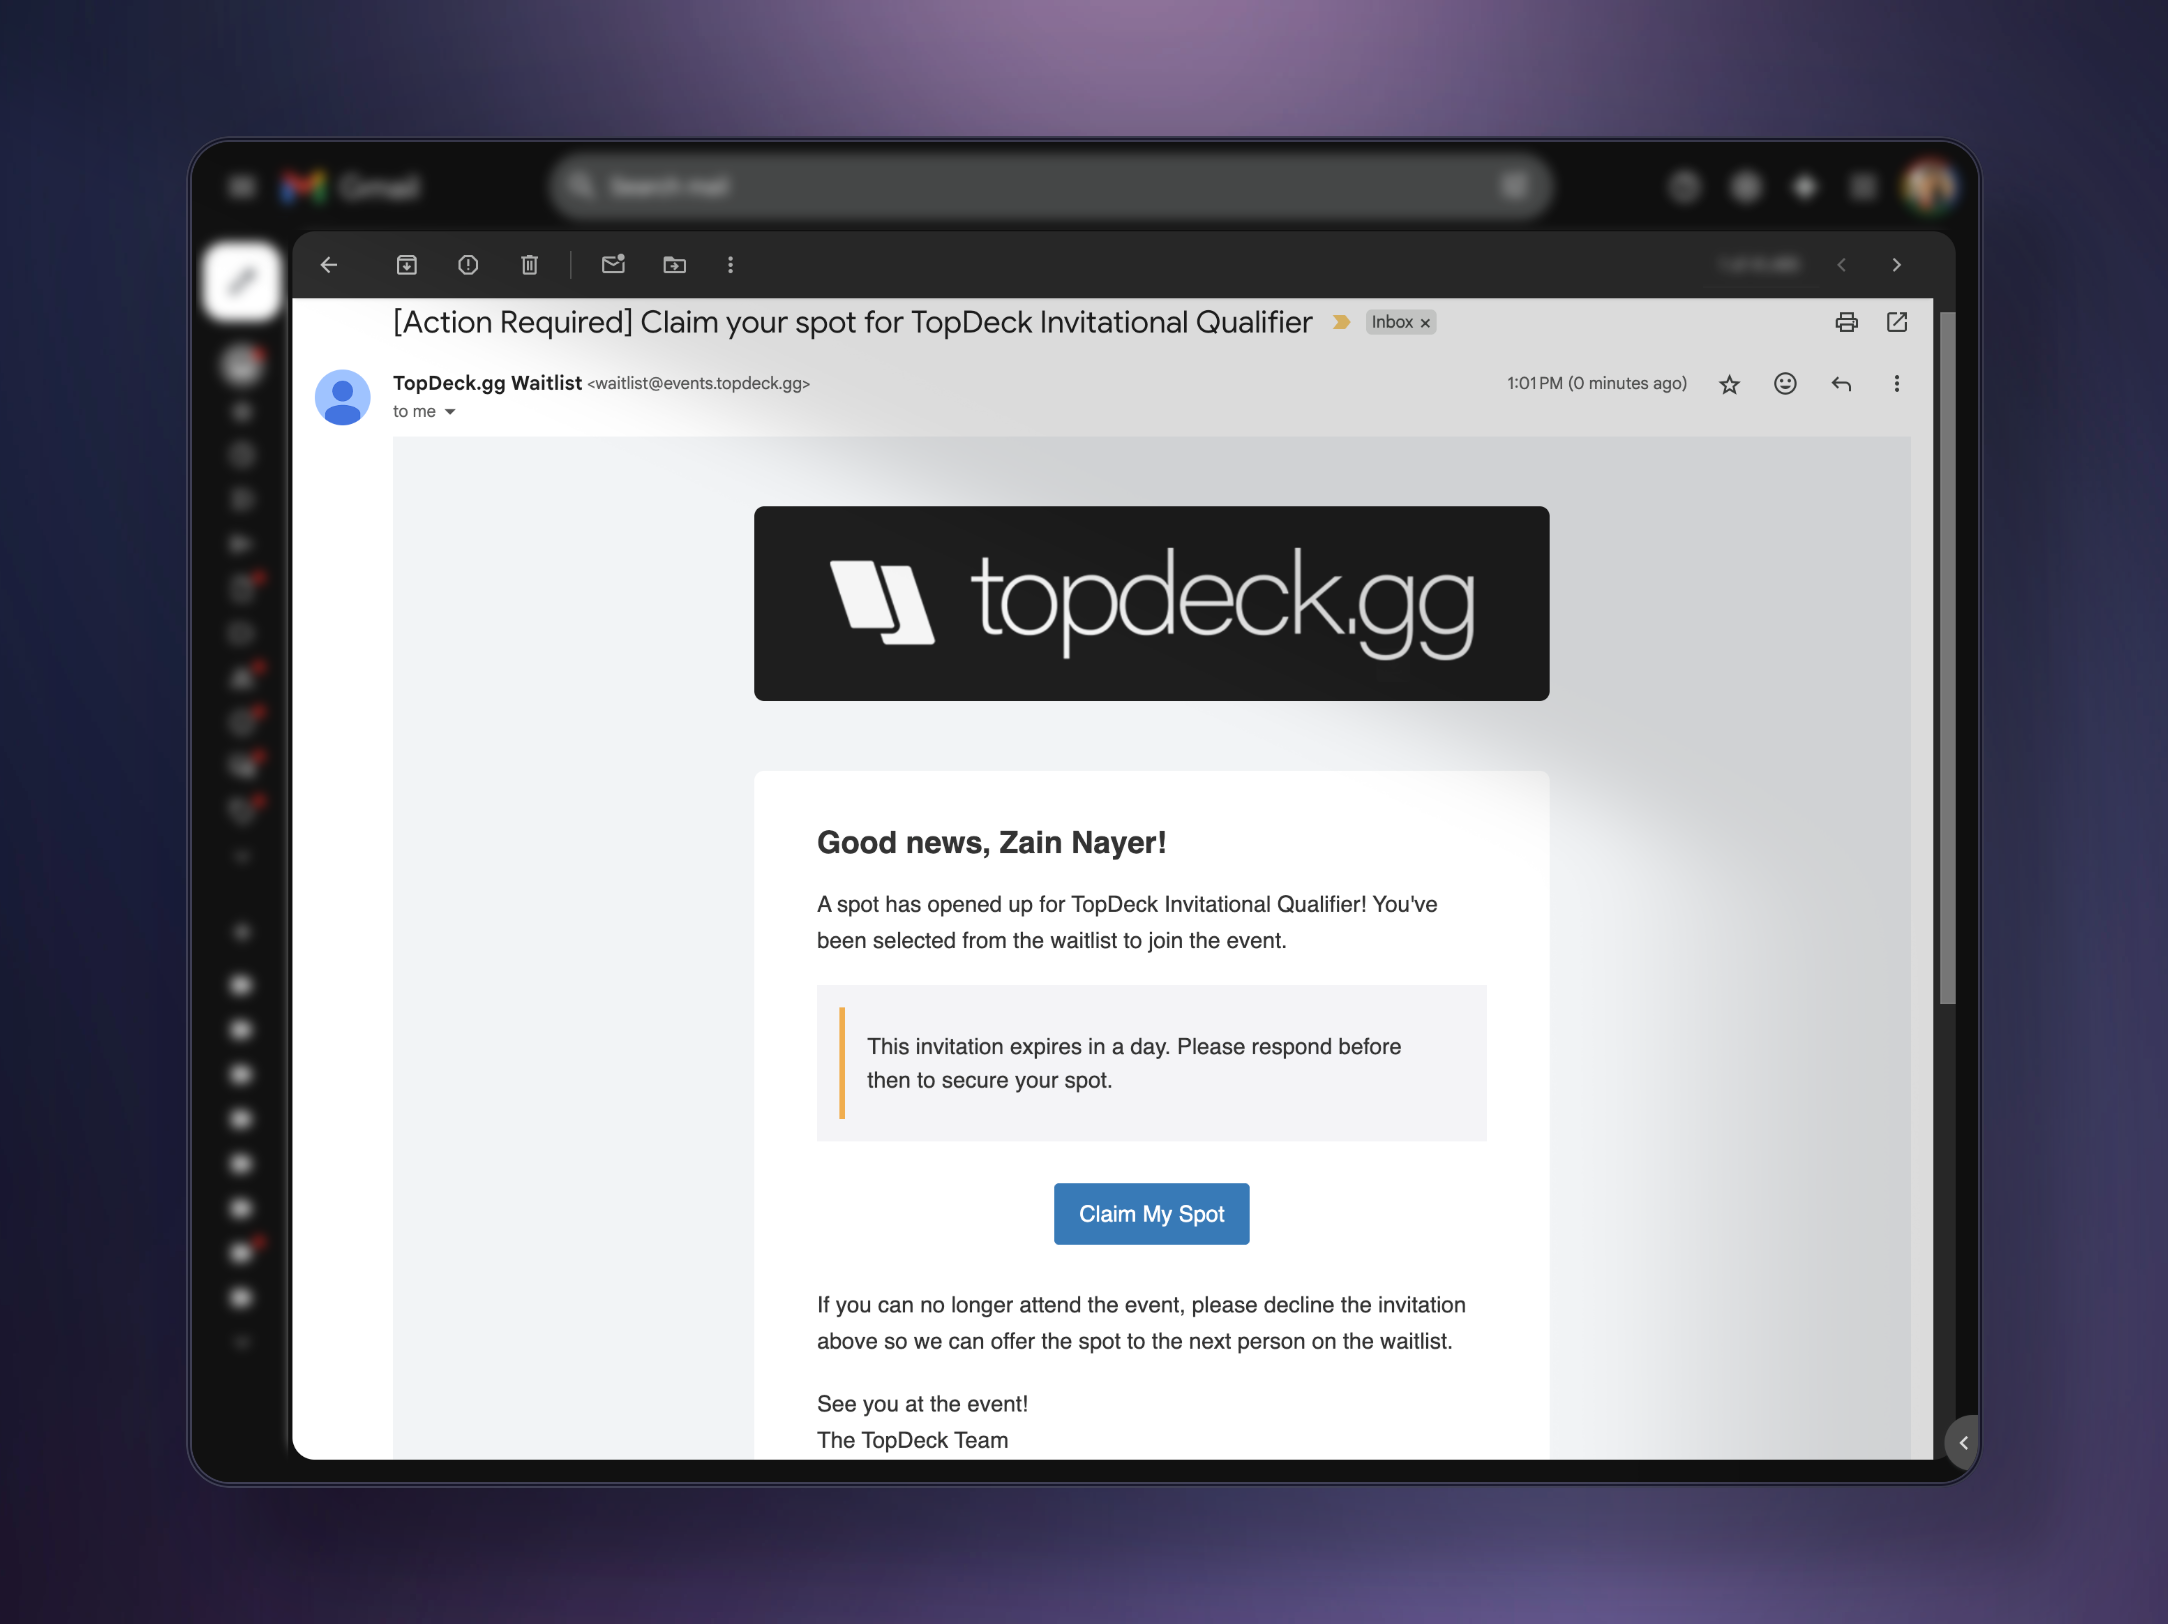
As spots open up, either from players being removed/refunded from the event or from the cap increasing, those on the waitlist will receive an email and notification that it's their turn to join the tournament.
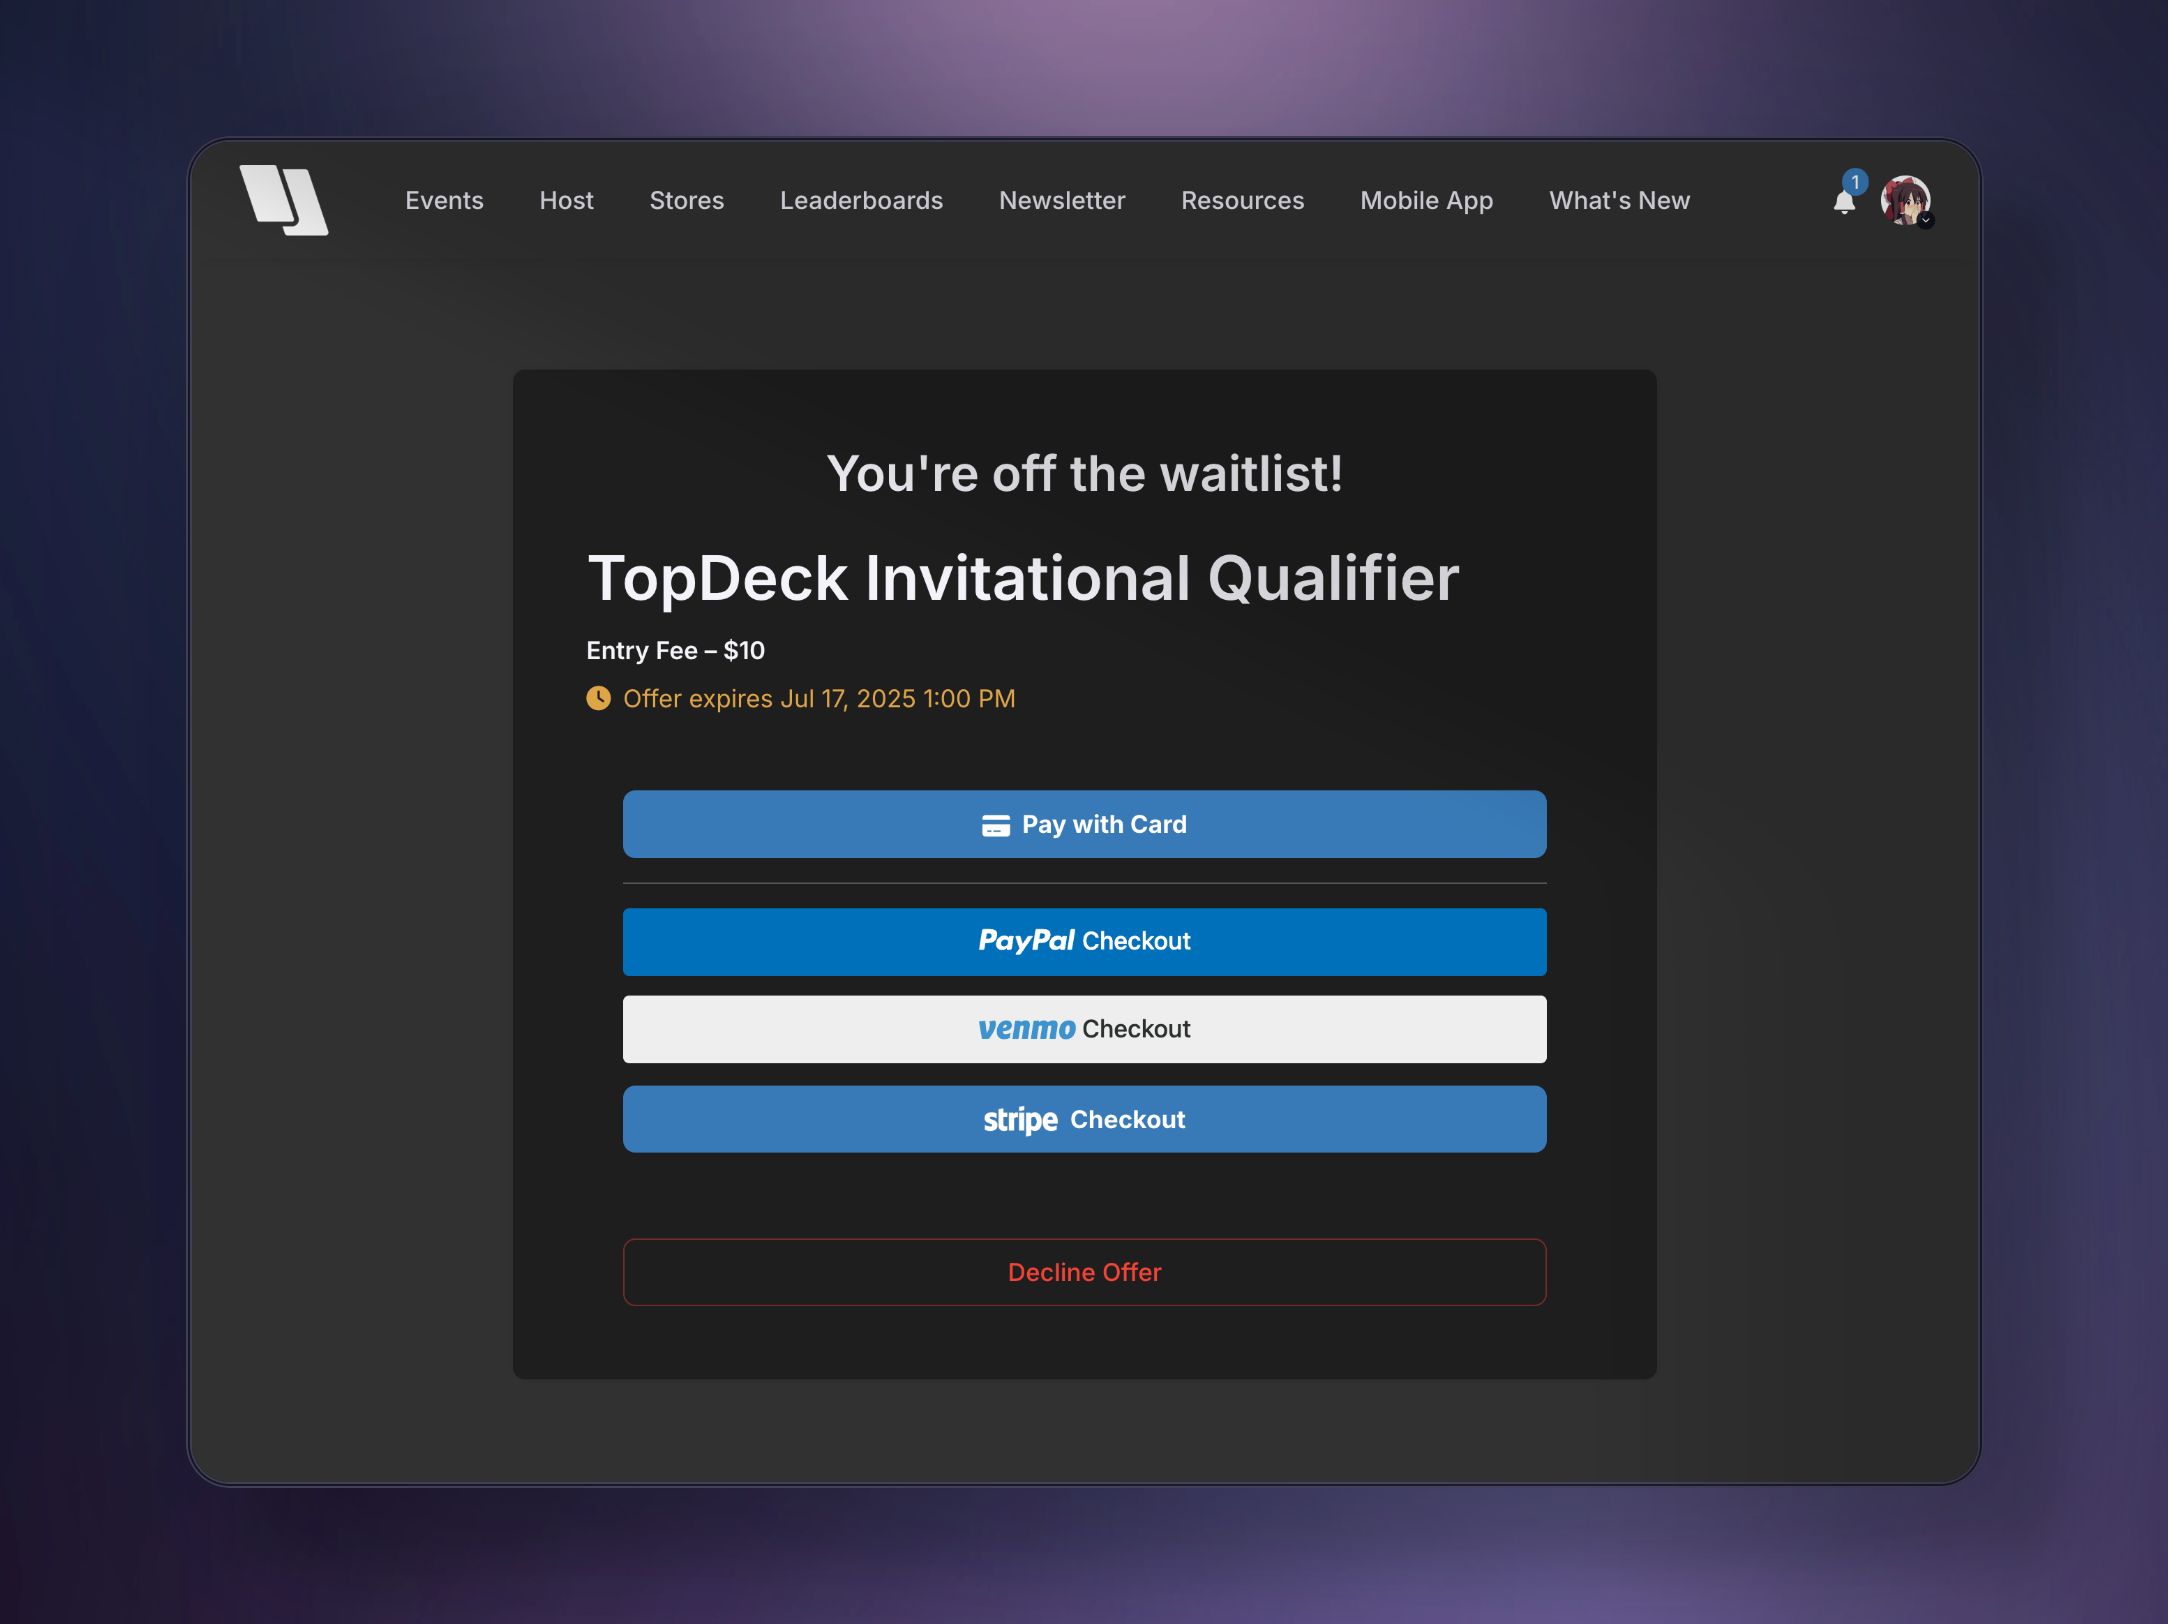
The email will direct them to pay and join at a special link.
How the Automation Works
Players will have a set time limit to either accept and pay for their spot or decline their spot. If they don't act in time, the waitlist automatically moves to the next person.
The expiration time is dynamic. This means if your tournament is further away, players have more time to respond, and if it's closer, they have less time. This promotes efficiency and keeps the waitlist moving as your event draws near.
The time table for responding to a waitlist email is as follows:
- 1+ month before the event: 48 hours
- 2-4 weeks before the event: 24 hours
- 1 week before the event: 12 hours
- 1 day before the event: 4 hours
- Less than 24 hours before the event: 1 hour
The automated waitlist stops functioning two hours before the start time of your event. This allows you to manage the attendance manually before game time.
Managing Your Waitlist
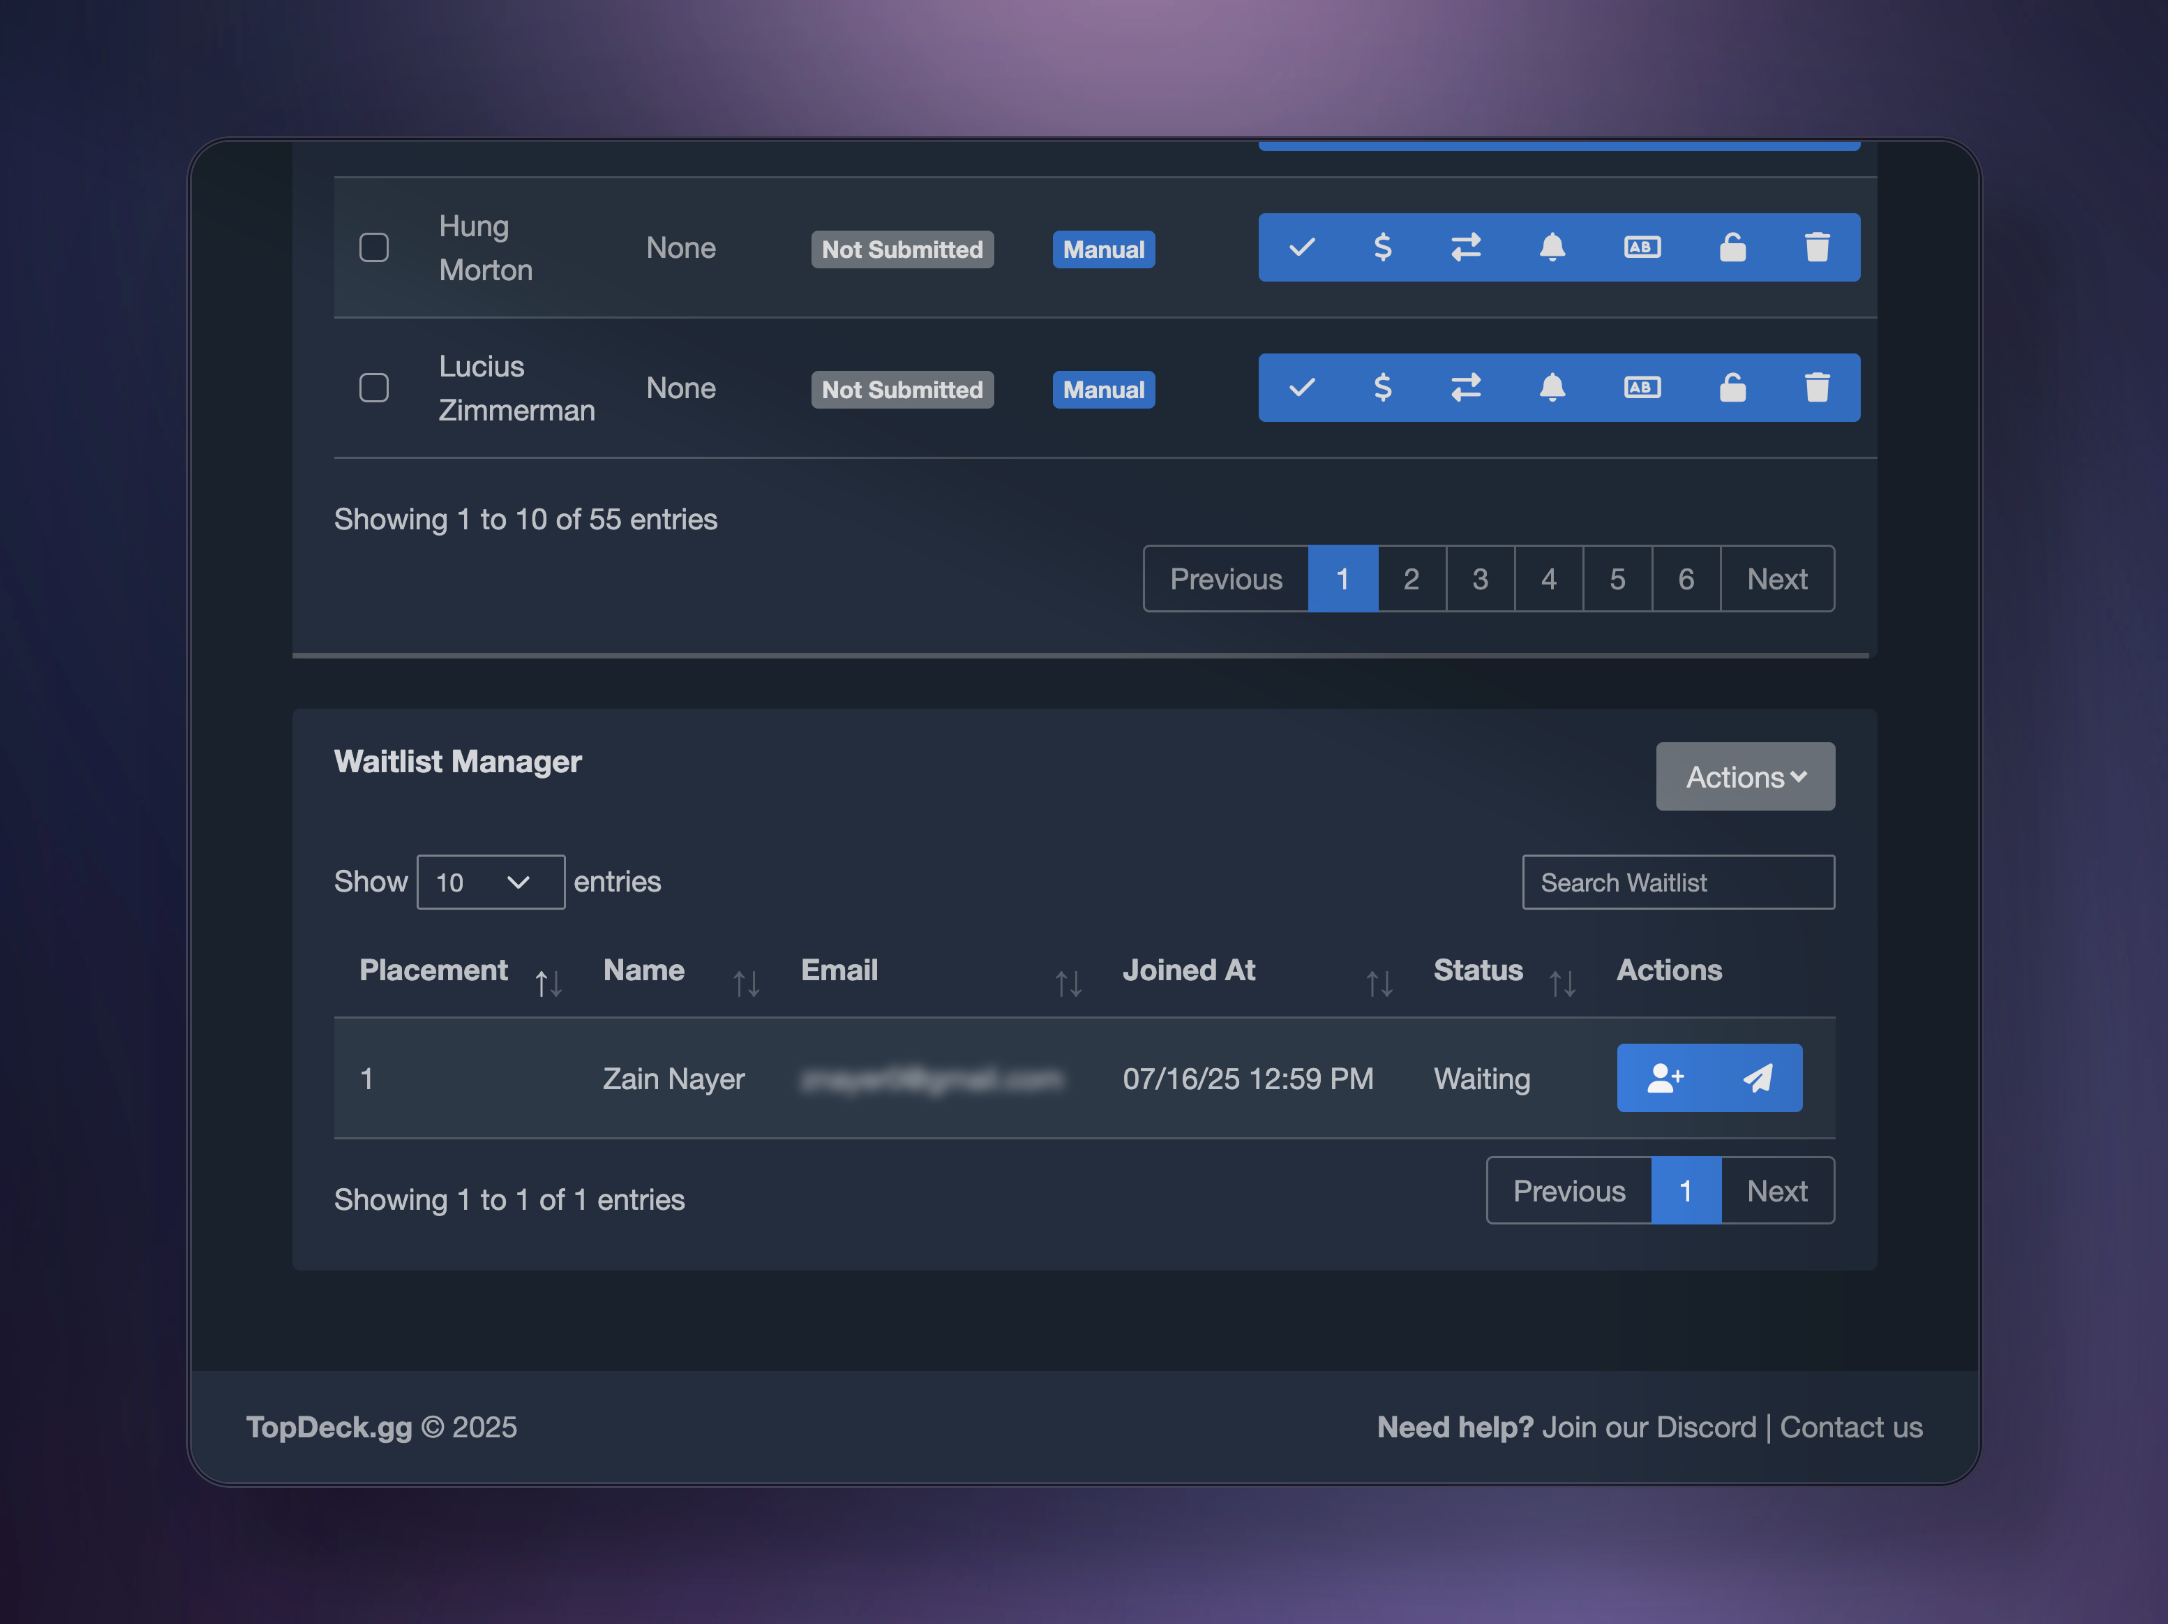
If you have an active waitlist, a Waitlist Manager will appear below the Player Manager on your tournament dashboard, listing everyone in queue order and their status. From here, you can automatically move anyone up to registered or send an offer manually.
Players will be able to see their spot in line on the event page and can see how many people are on the waitlist before joining.
Messaging All Players
Finally, in the Actions menu, you can use Message All Players to send mass communications to everyone regarding the tournament. Additionally, you can select several players and use Send Message under Mass Player Actions to send messages in bulk to specific players.